How to setup QZ Tray (Printer)
How to Set Up QZ Tray
In RepairDesk, open the Store settings page from the left side select hardware Settings then QZ Tray (Printer). Below mentioned page will be displayed

In step one, You can enable / disable the direct printing clicking on the Do you want to use QZ tray integration? Radio button.
In the second step, download the QZ Tray desktop client and JDK for your operating system from the download popup by clicking on Download Software, as shown in the screenshot below.

In the third step, You can synchronize all the printers that are connected to your system using the Sync button.
Before synchronization please download the relevant drivers for your printer and install into the system. As in the below screenshot all the printers that are connected with the system.

Now all the printers will be listed on the Manage printer section as shown in the below screenshot.
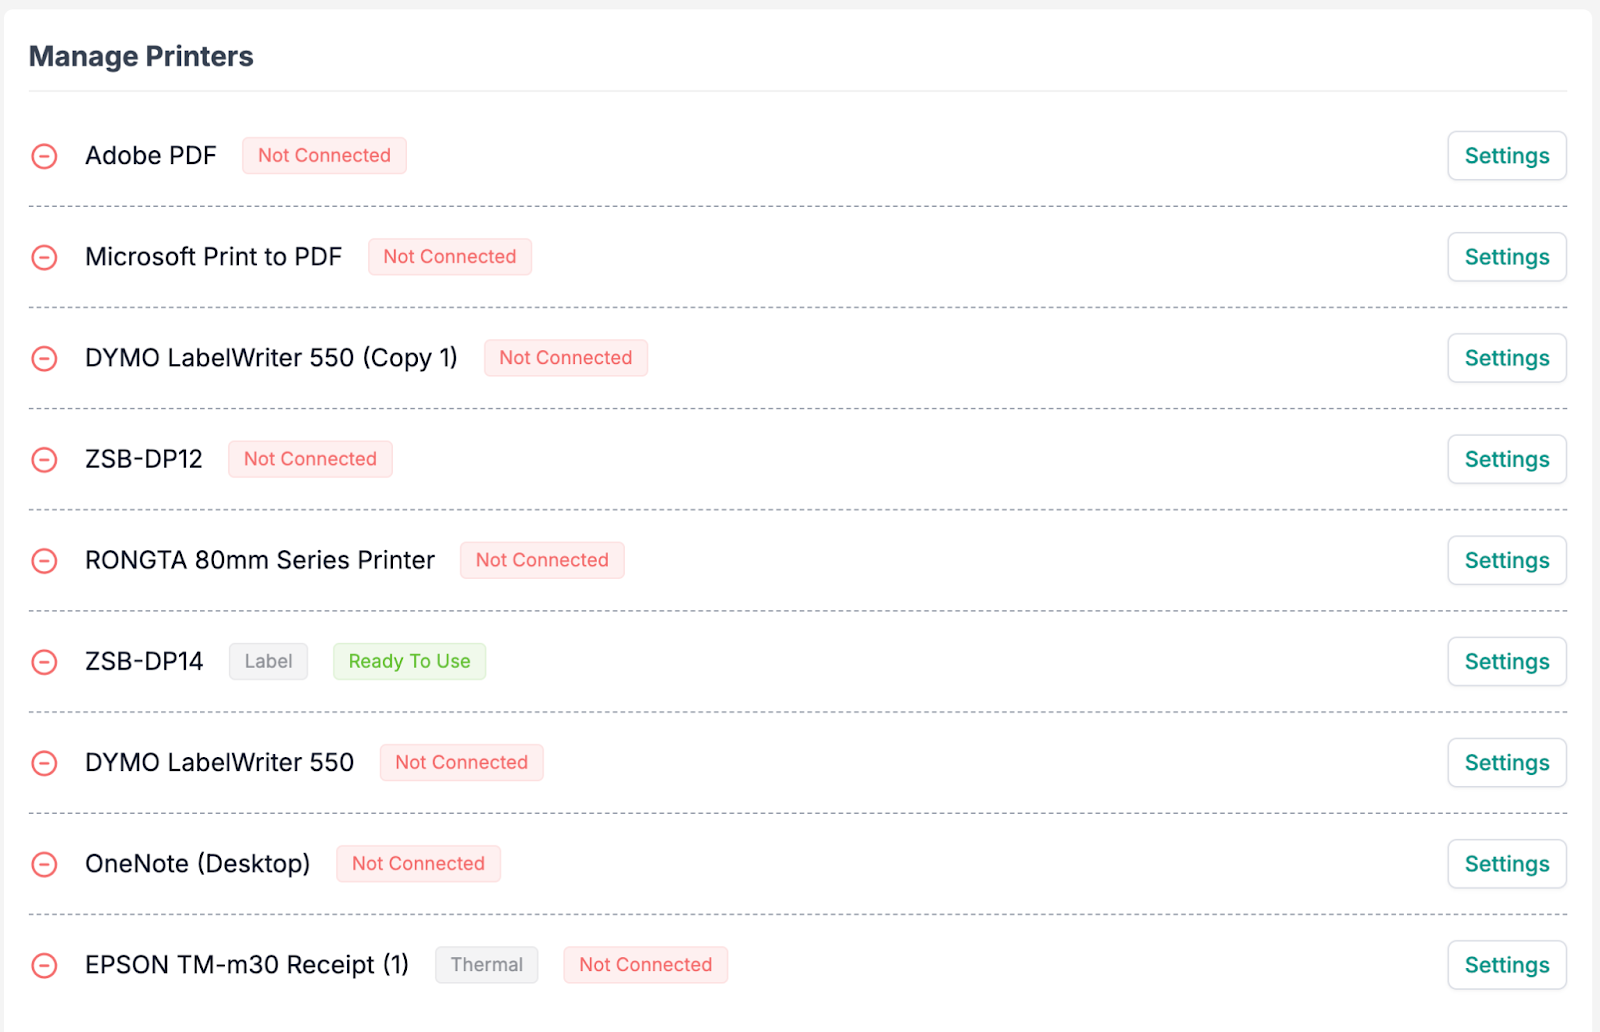
From the Manage Printers listing you can Setup, Remove the printer. Against the each printer its printer type and printer status are showing
By clicking on the settings button you can configure the printer (Thermal / Label) according to your need as mentioned below.
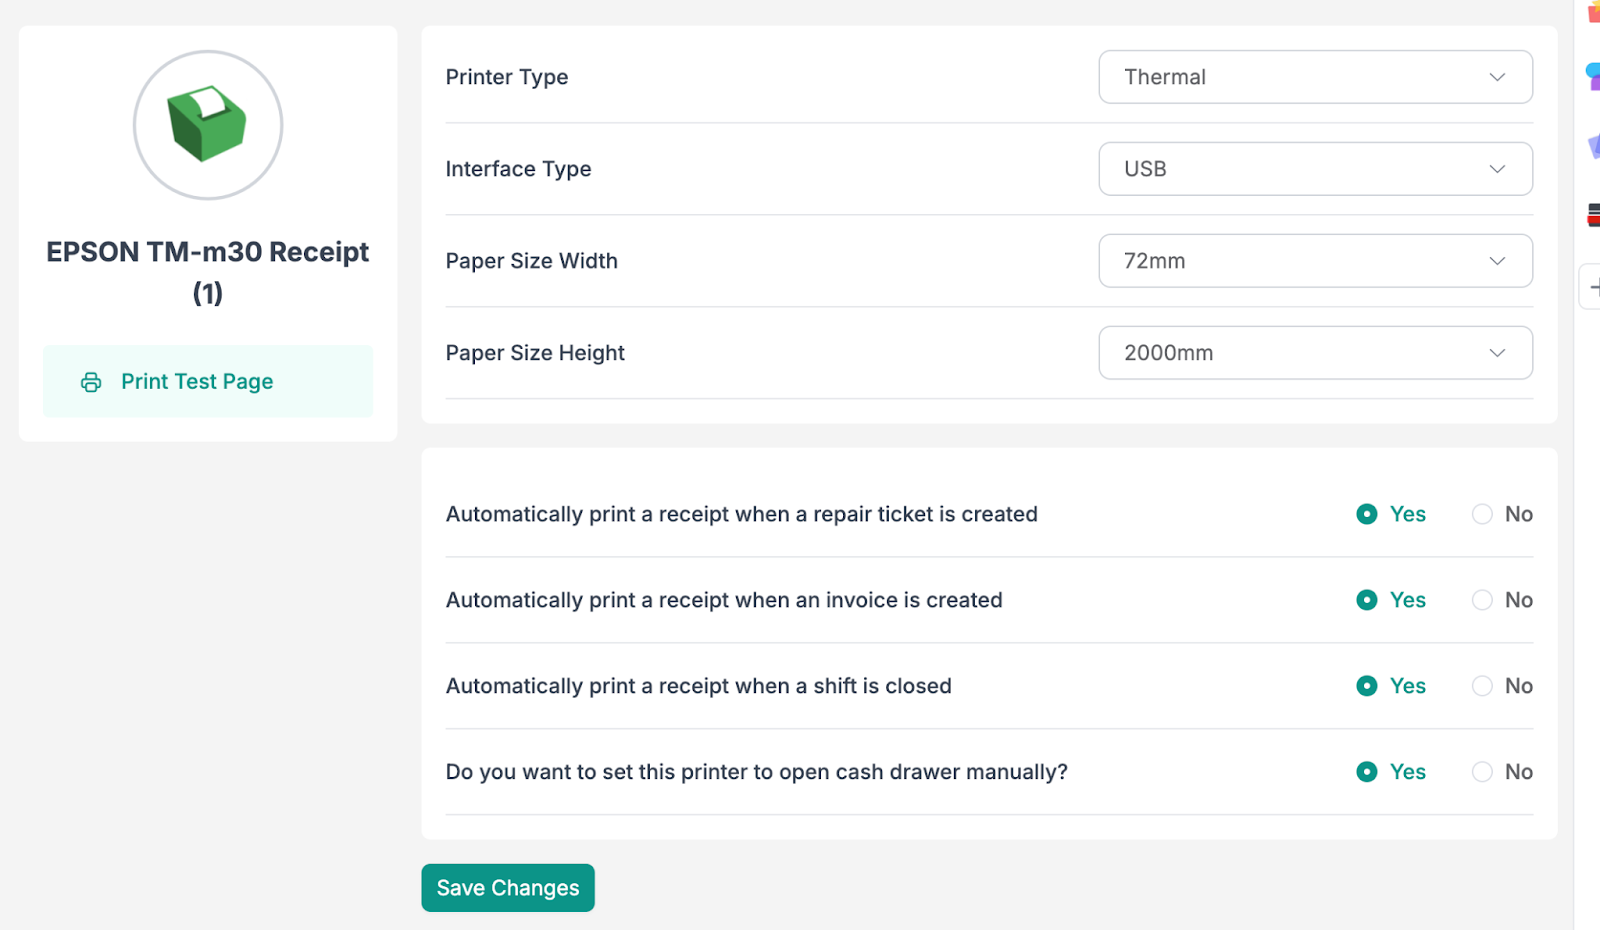
Select the printer type (Thermal / Label) then select the interface type (USB / Ethernet). You can also set the printer paper size (Width / Height).. You can also enter customized paper size (Width / Height) as your printer supports. But only printer standard size is recommended. After setup you can verify the print by clicking on the Print Test Page button as you can see in the above screenshot.
You can configure the mentioned trigger as you can see in the above screenshot
Automatically print a receipt when a repair ticket is created.
Automatically print a receipt when an invoice is created
Automatically print a receipt when a shift is closed
Do you want to set this printer to open the cash drawer manually?
Above four triggers work with the Thermal printer.
Automatically print a label when a repair ticket is created
Automatically print a label when an invoice is created
Above two triggers work with the Label printer.
For the accurate label and thermal printing you need to set the standard size that supports the printer. You can check the printer sizes in the recommended hardware settings.
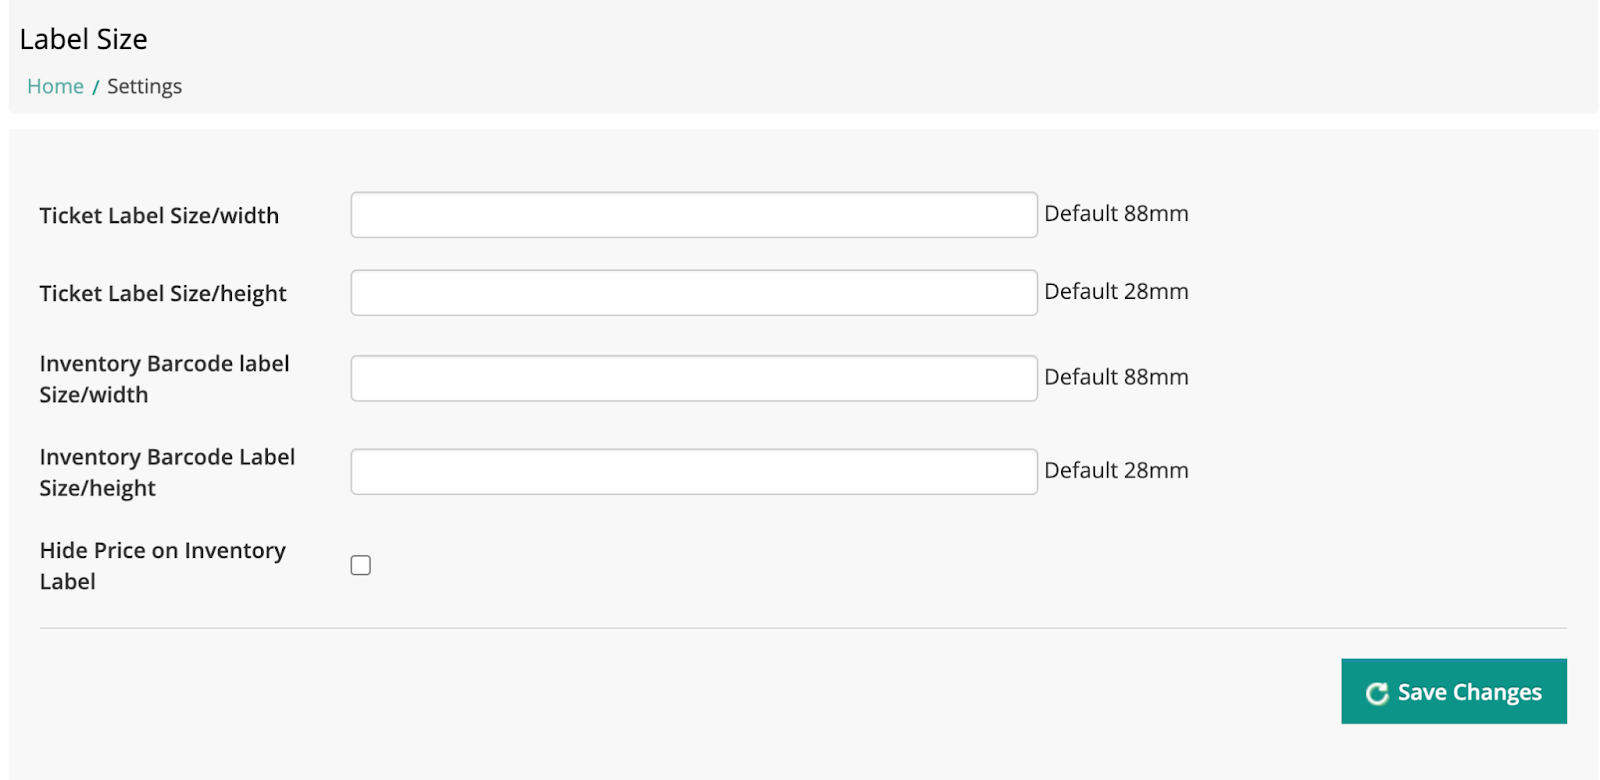
For the Label sizes you can click the link Label Size in the hardware settings. When you click on it, the below mentioned screen will be displayed.
By using the form you can put the actual label size for ticket and inventory labels for accurate printing. If you leave empty fields then there is default width and height.
For the thermal you need to check the printer setting into your system for the adjustment of paper height. As mentioned in the recommended hardware.
In windows you can set the printers setting in system settings (Printers & Scanner)
In Mac os you can use CUPS (http://localhost:631/) for the printer settings.
Recommended Hardware
Epson Thermal (72mm X 2000mm) (https://epson.com/Support/Point-of-Sale/Thermal-Printers/Epson-TM-m30-Series/s/SPT_C31CE95011)
Rongta Thermal (80mm X 3276mm) (https://www.rongtatech.com/category/downloads/1)
Dymo Label (58mm X 101mm) (https://www.dymo.com/support?cfid=user-guide)
Zebra Label (It has multiple supported paper you can configure the printer size according to your) (https://zsbportal.zebra.com/login)