How to enable Safeware integration in Repairdesk?
Introduction
Safeware is a company that offers extended warranty and insurance solutions for a variety of products, including technology, fitness, furniture, and appliances. It's integration with RepairDesk has helped many mobile shop owners using repairdesk to offer warranty and insurance solutions to their clients.
How to Setup?
1. Setting up the Safeware at the Repair desk is a piece of cake!
2. First, you need to Log in to RepairDesk.
3. Go to Settings >> Integrations >> Safeware.
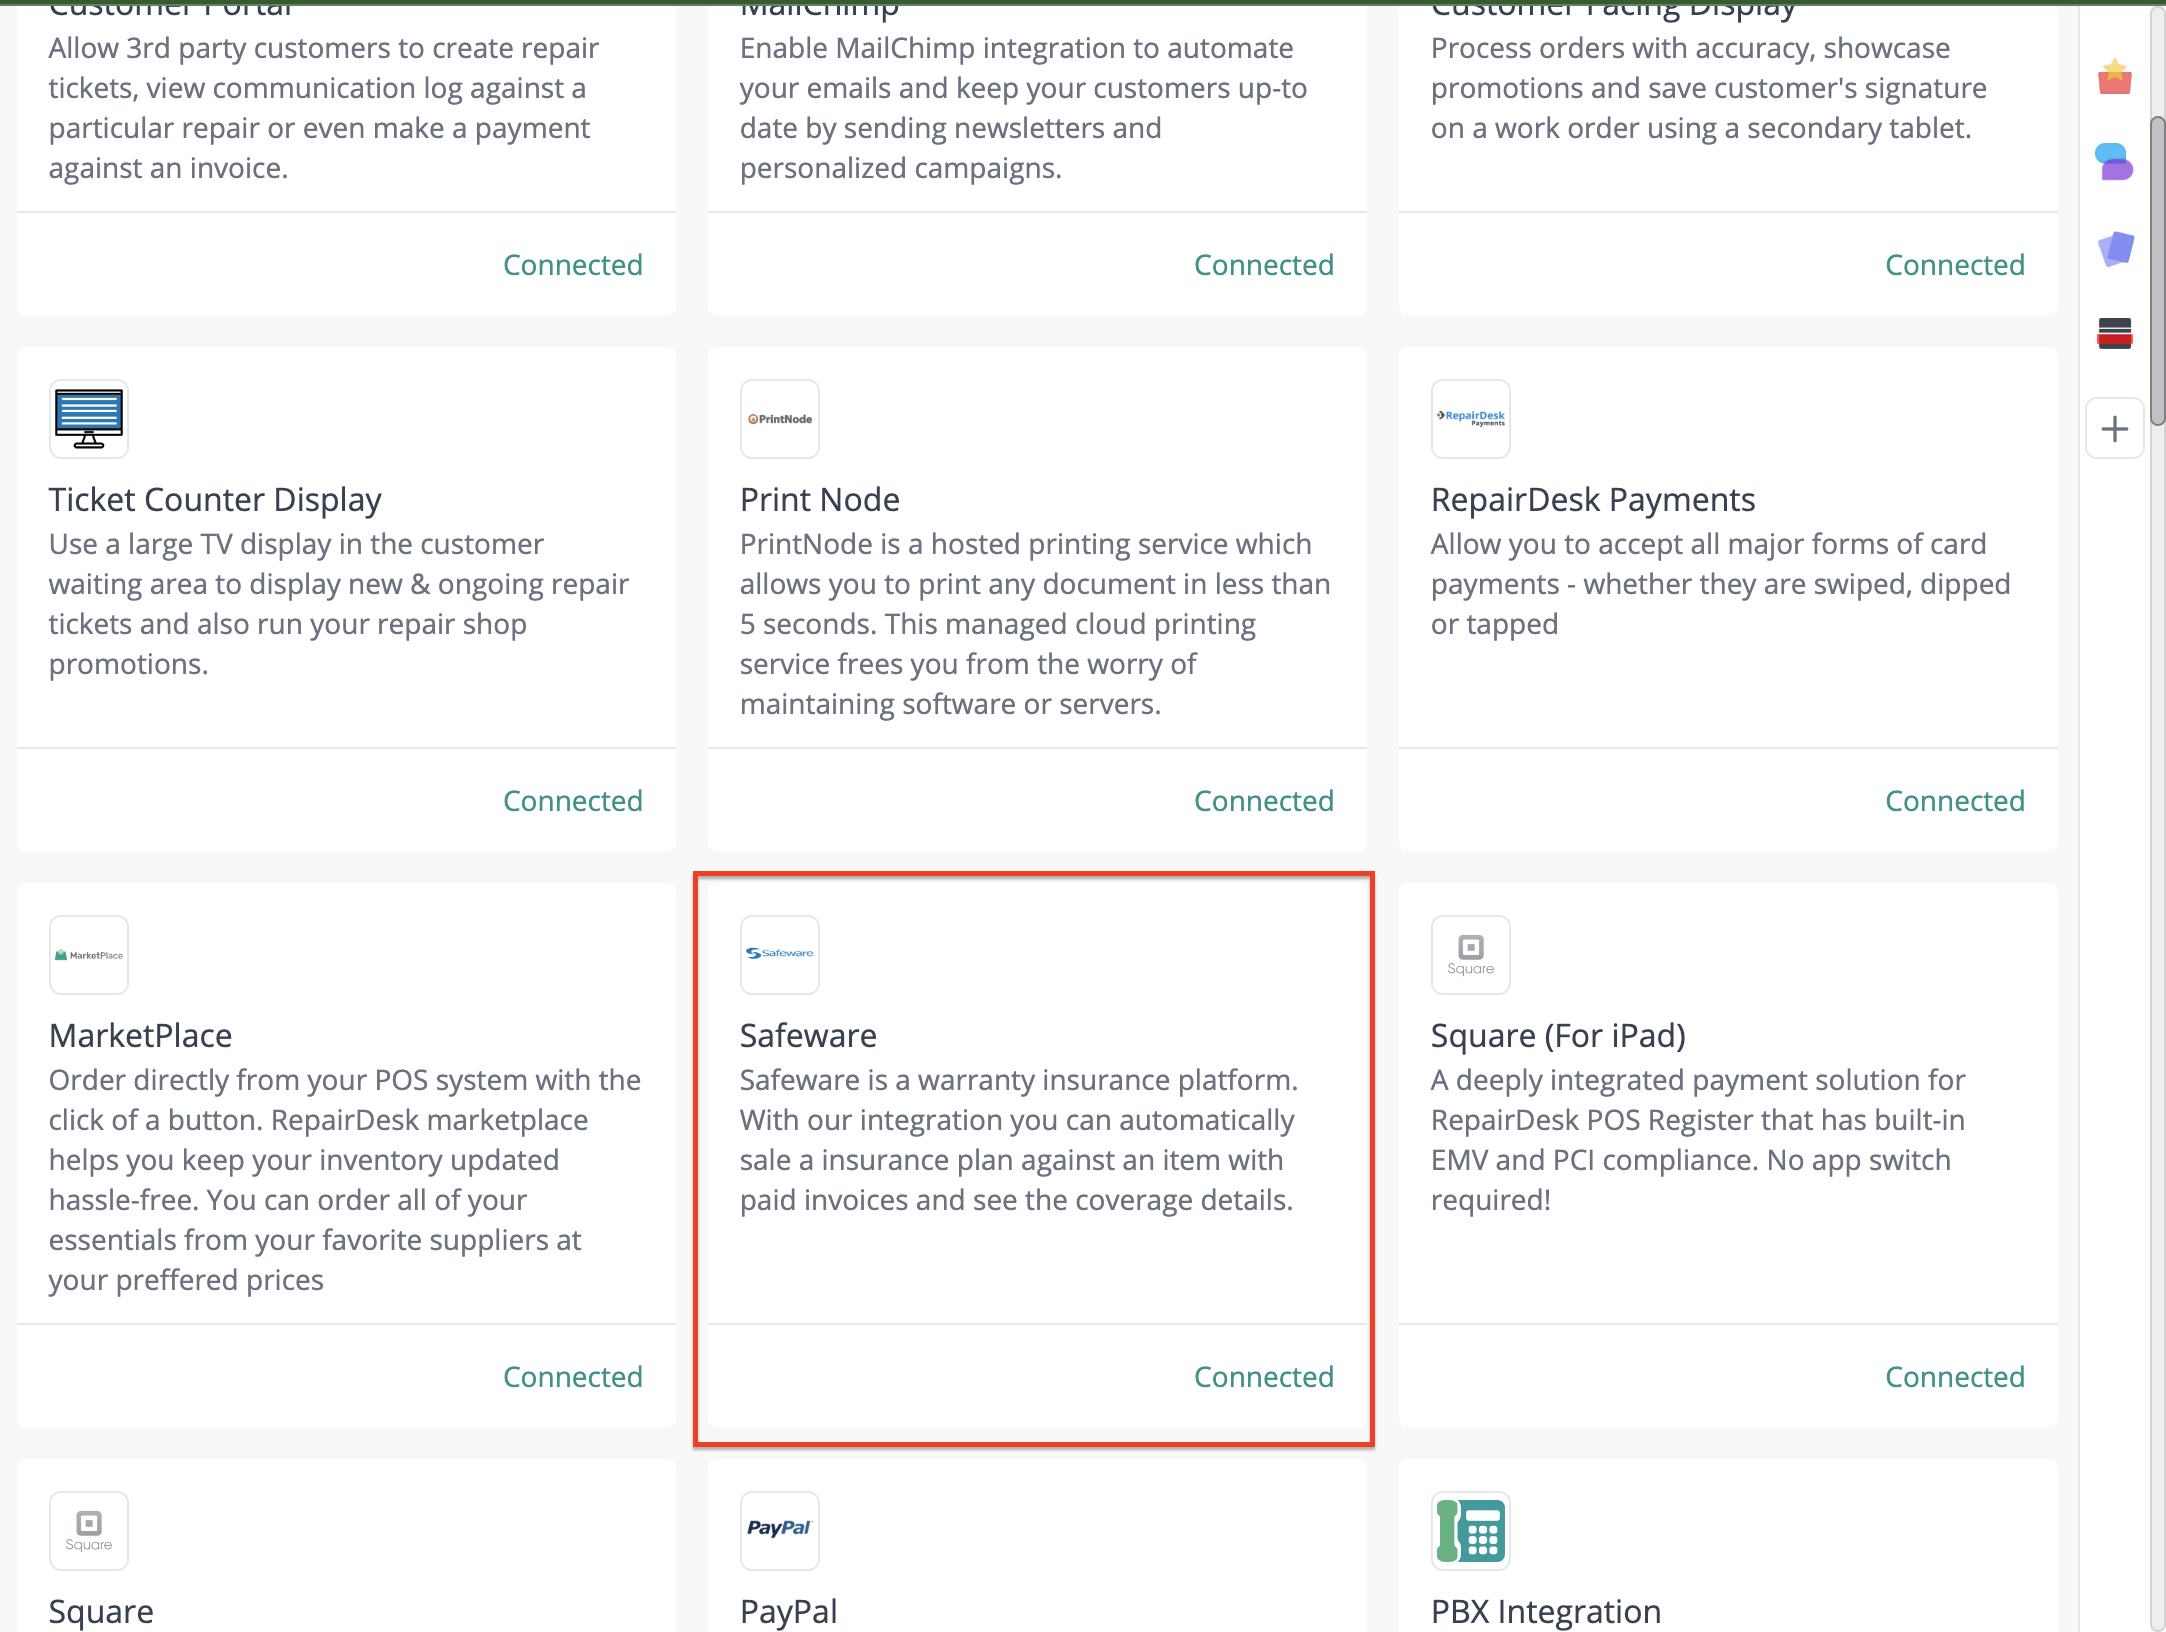
4. Click on Enable button
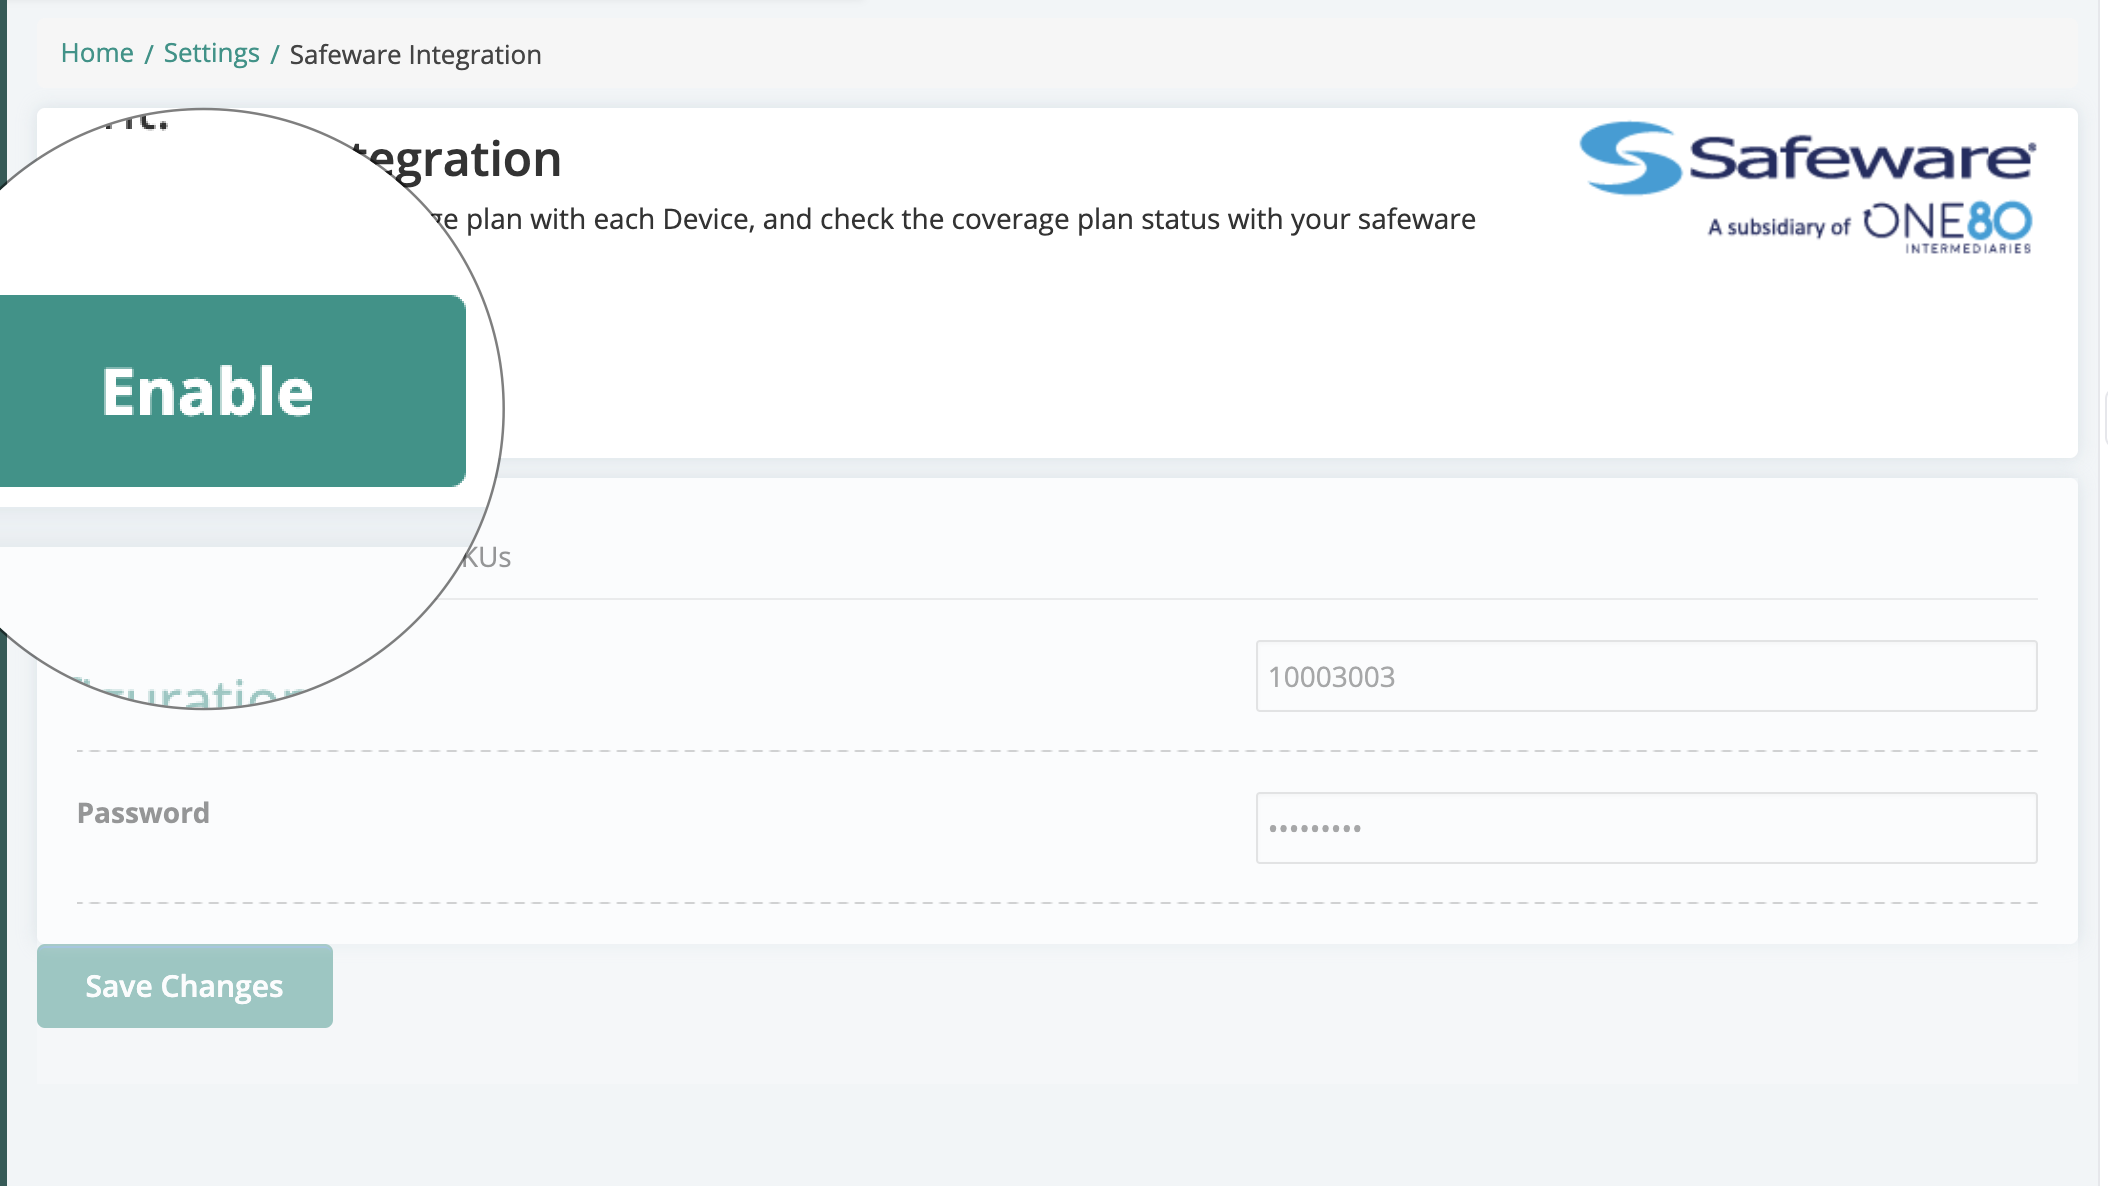
5. After Enabling the integration, You have to enter the User Name and Password provided by the safeware under the Configuration tab

6. After entering the Username and password, you need to press the Save Changes button.
7. After saving the Username and Password, click on the Safeware SKUs tab

8. Under the Safeware SKUs tab, you need to select the category against each Safeware SKUs
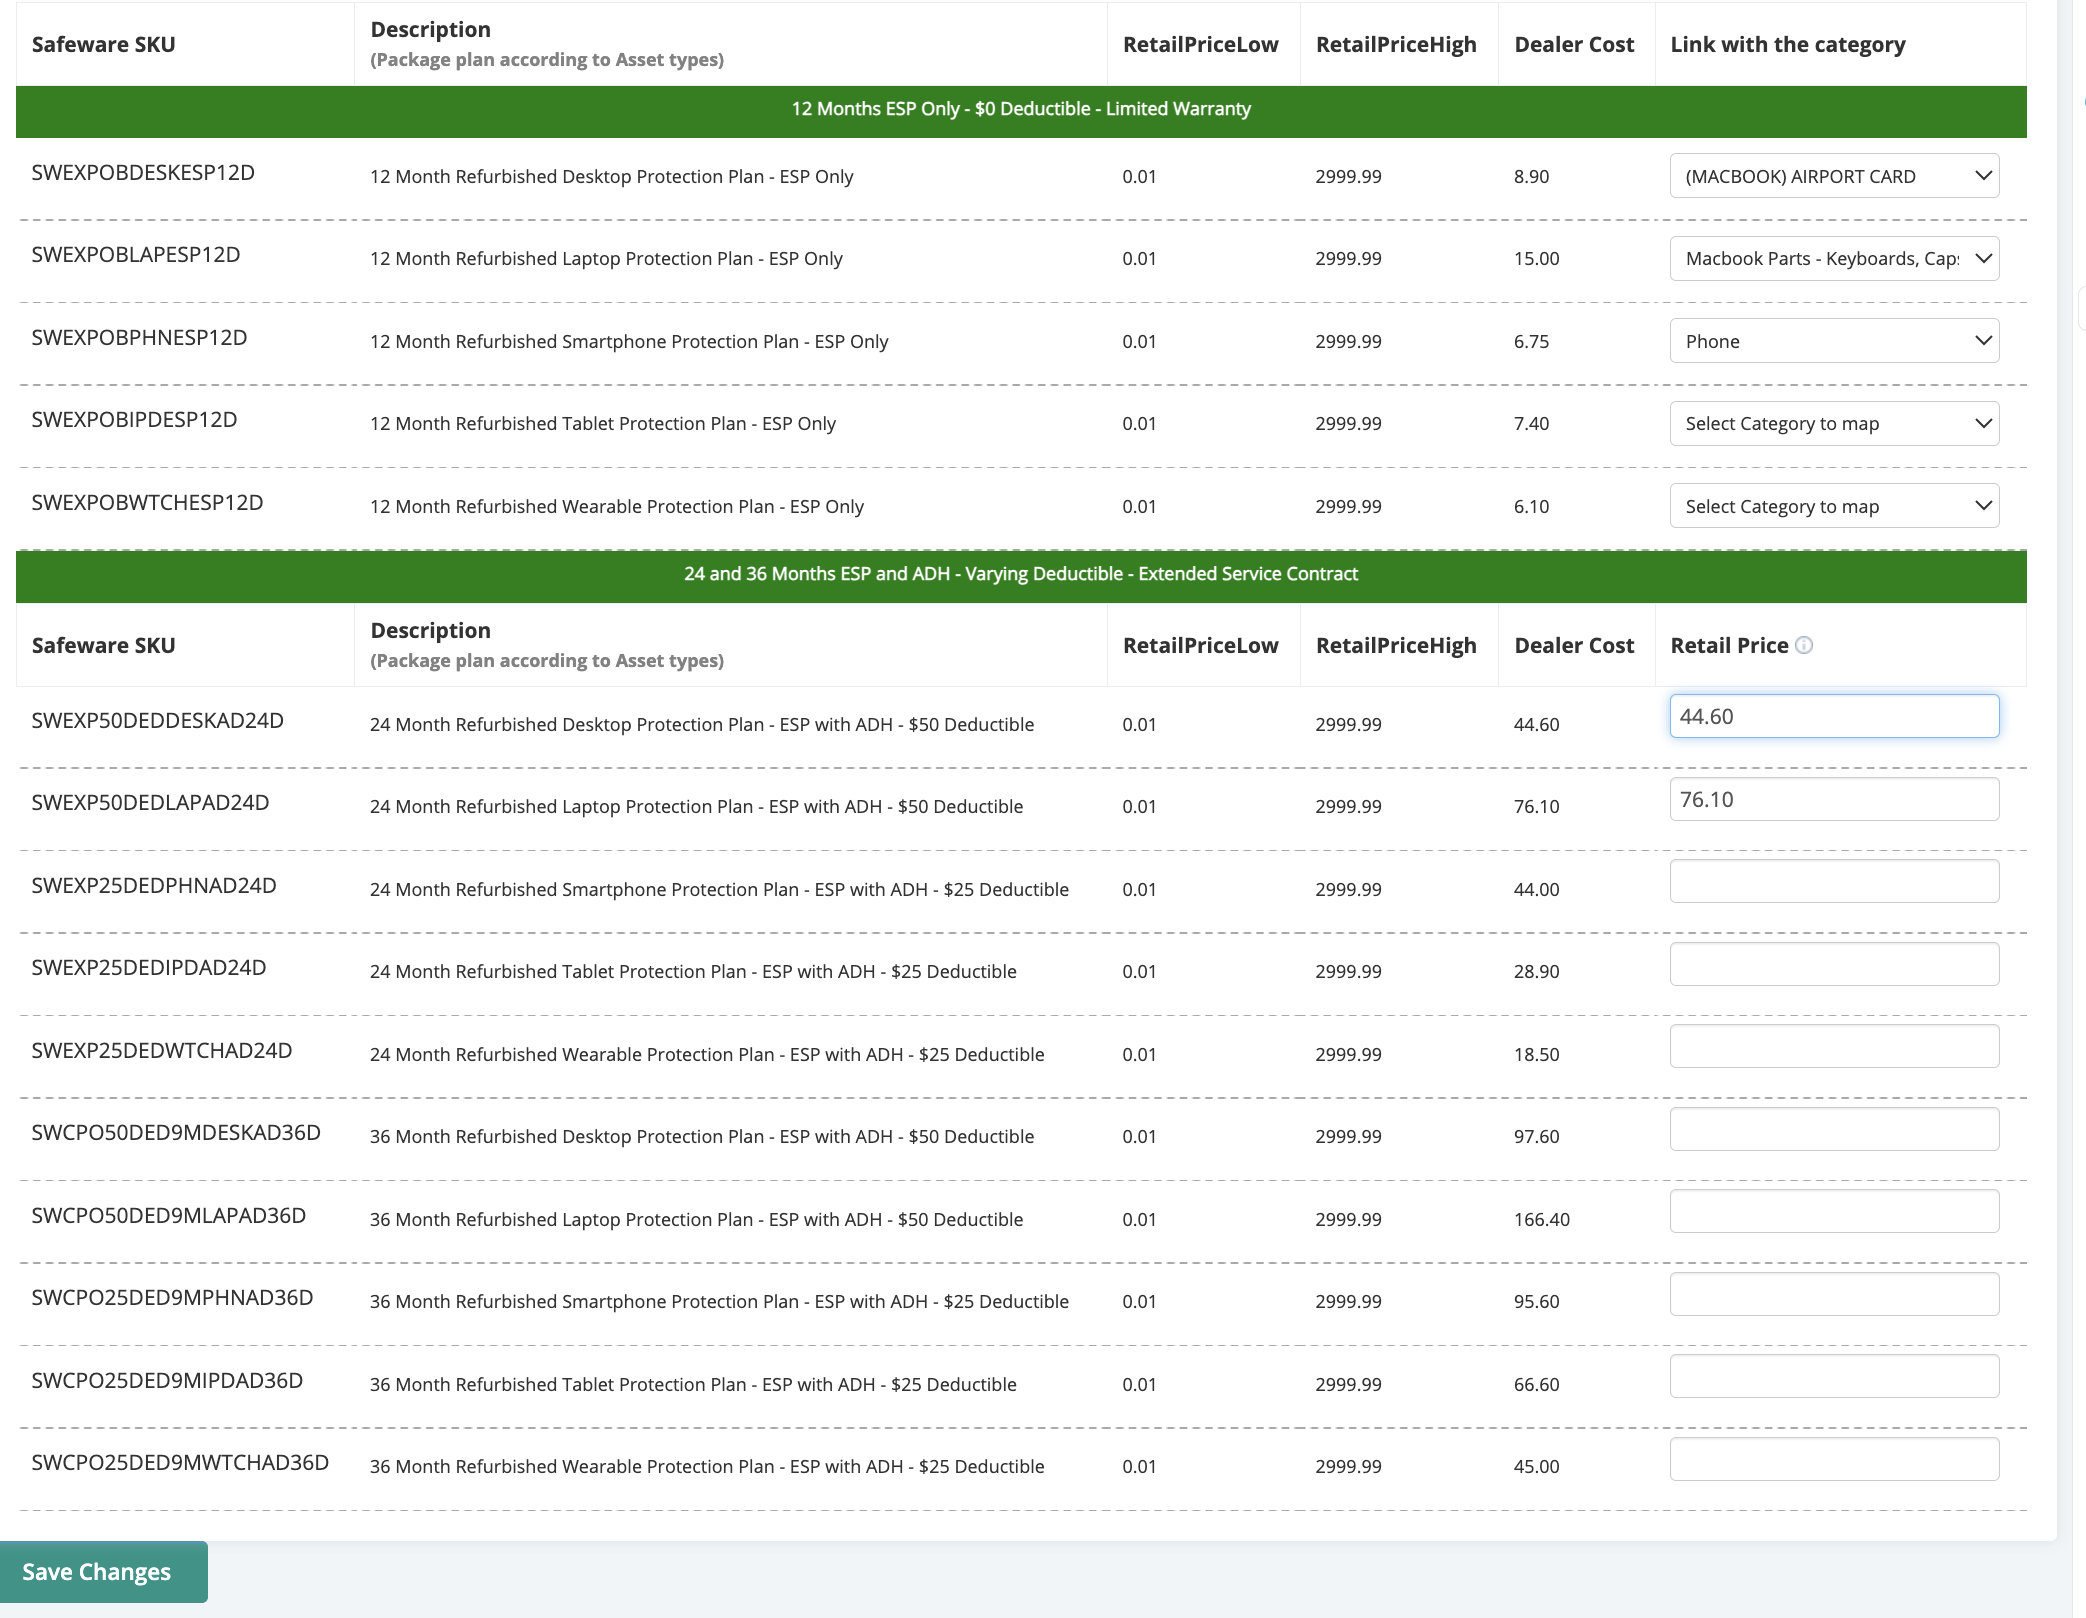
Note: The warranty would only be applicable to the selected category in which the item’s price is between 0.01 & 2999.99
You can see plans i.e. 12 months, 24 months and 36 months.
9. After selecting the category and setting up the retail cost, you just need to click on the Save Changes button.
10. After clicking on the Save Changes button, you will see a confirmation message “Configuration updated Successfully”
11. After successfully setting up the configuration, you first need to create the serials for the items because this integration would work only for serialized items.
13. After creating the serials and selling them on POS, you first need to select the serial.
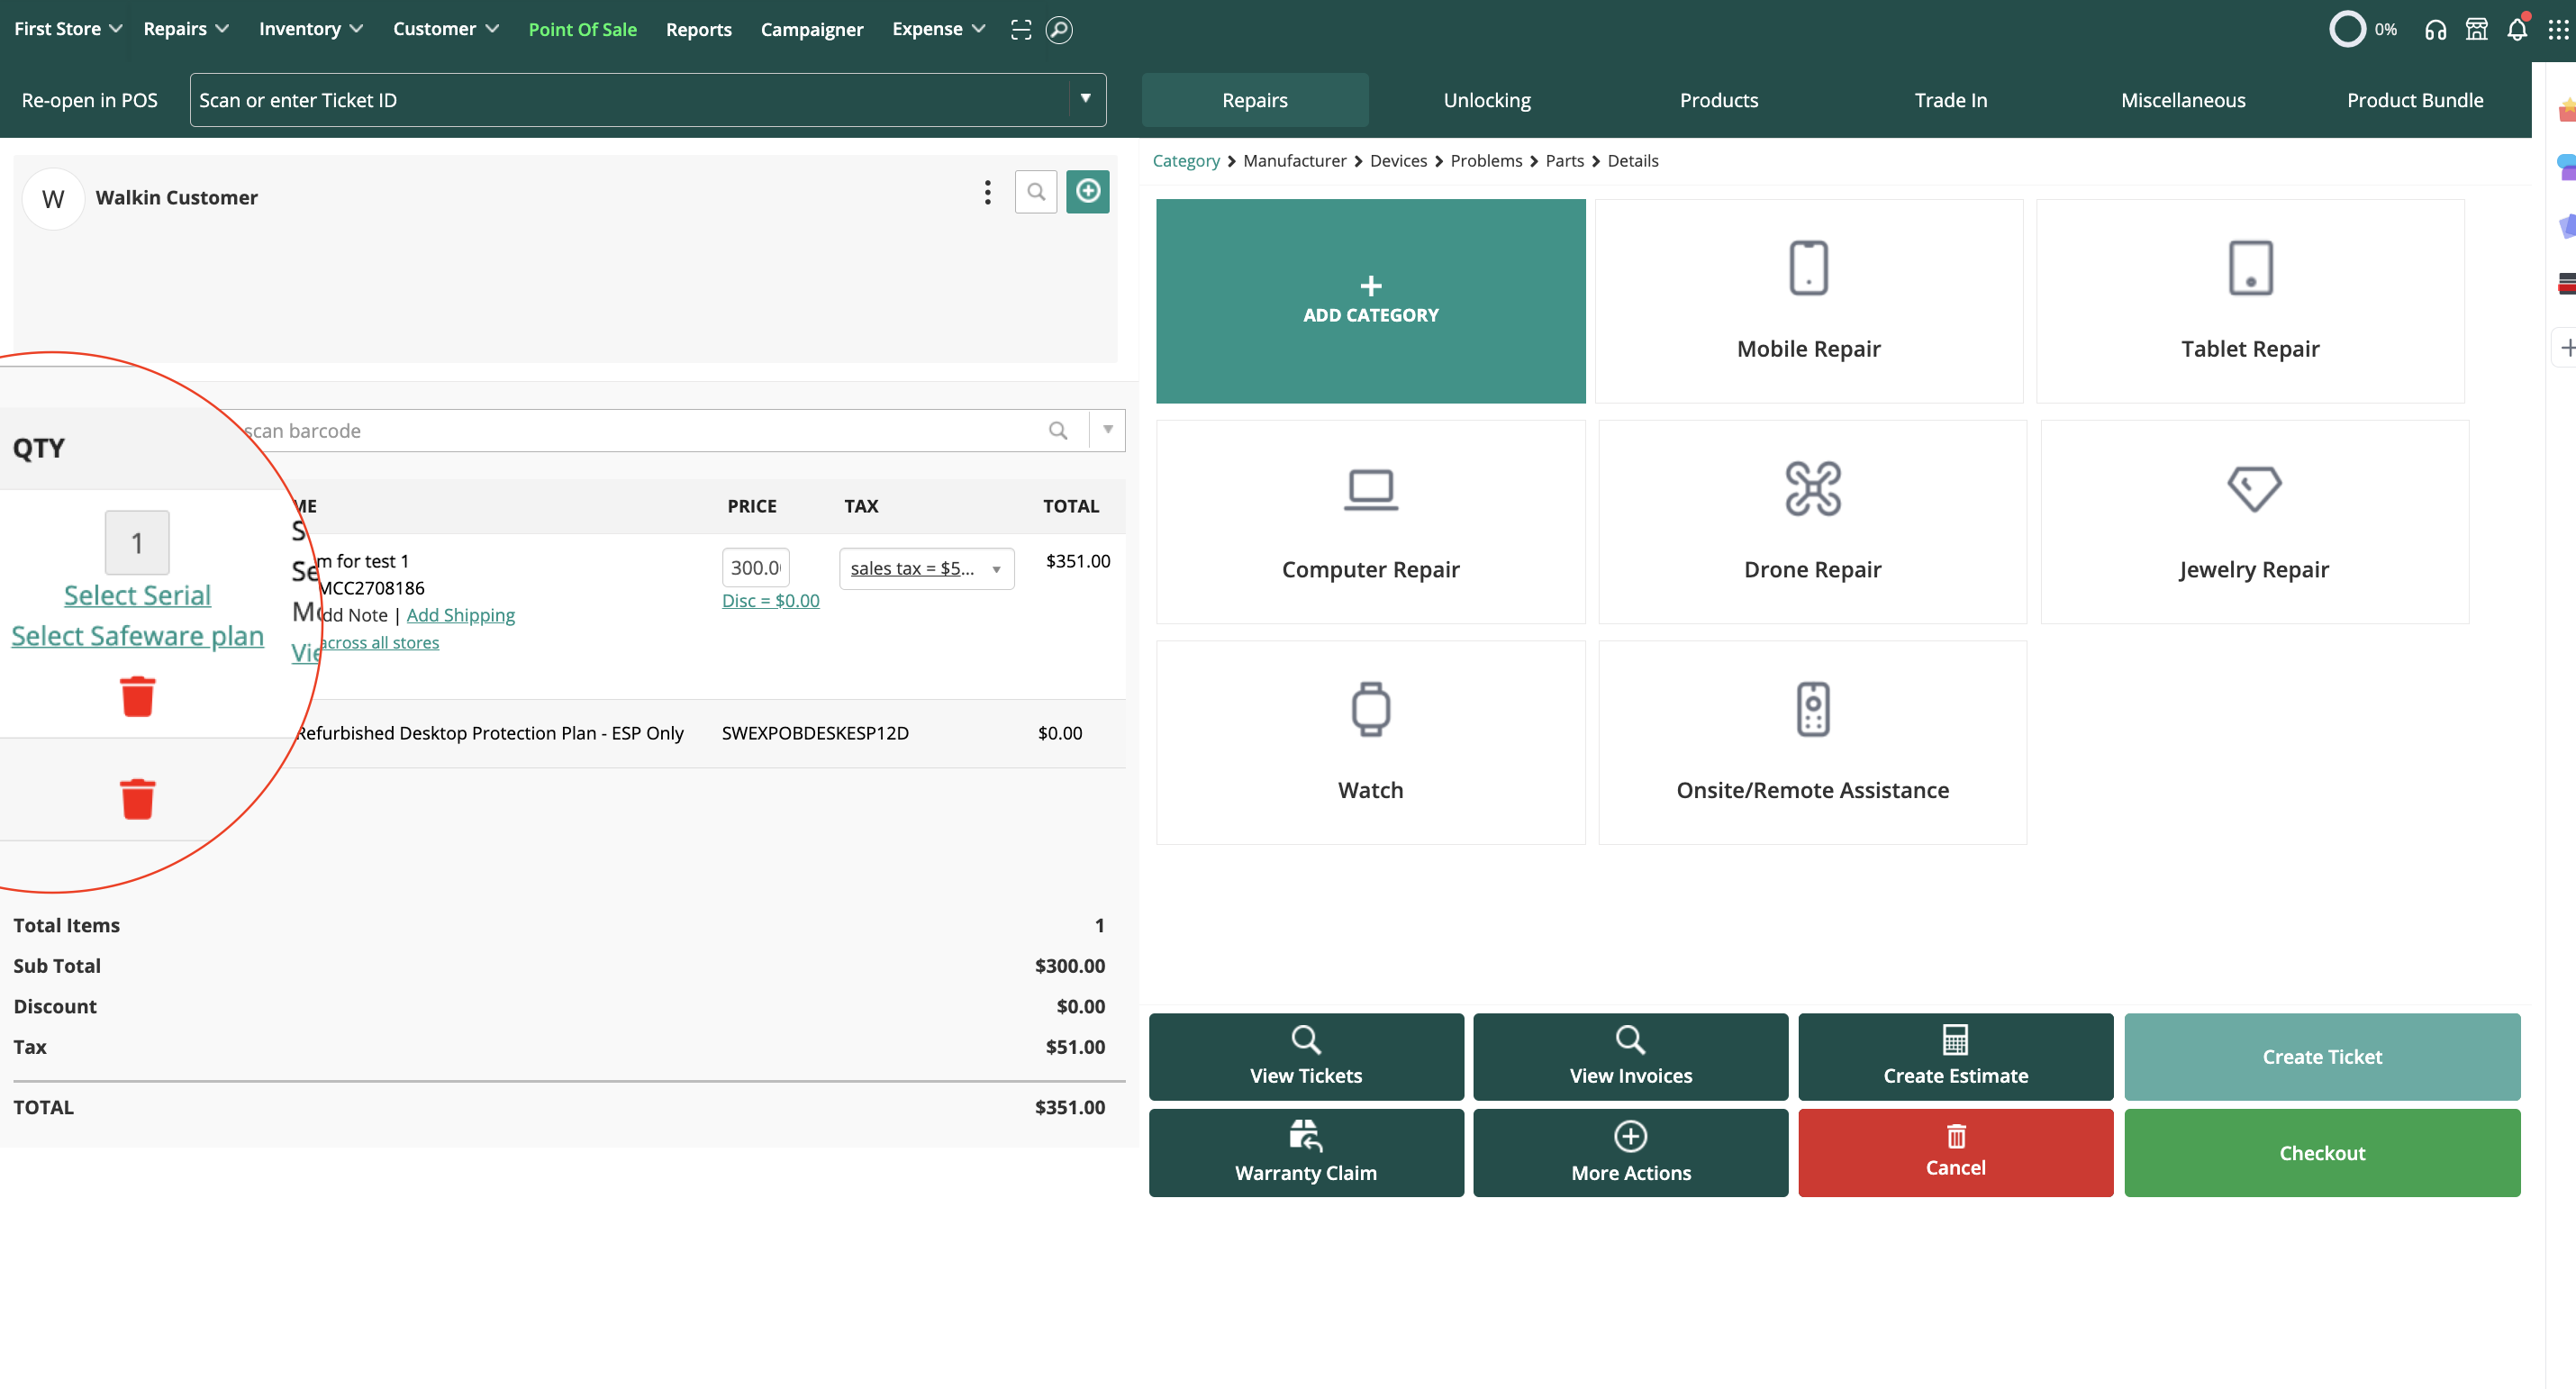
14. After selecting the serial, you would be shown the following popup
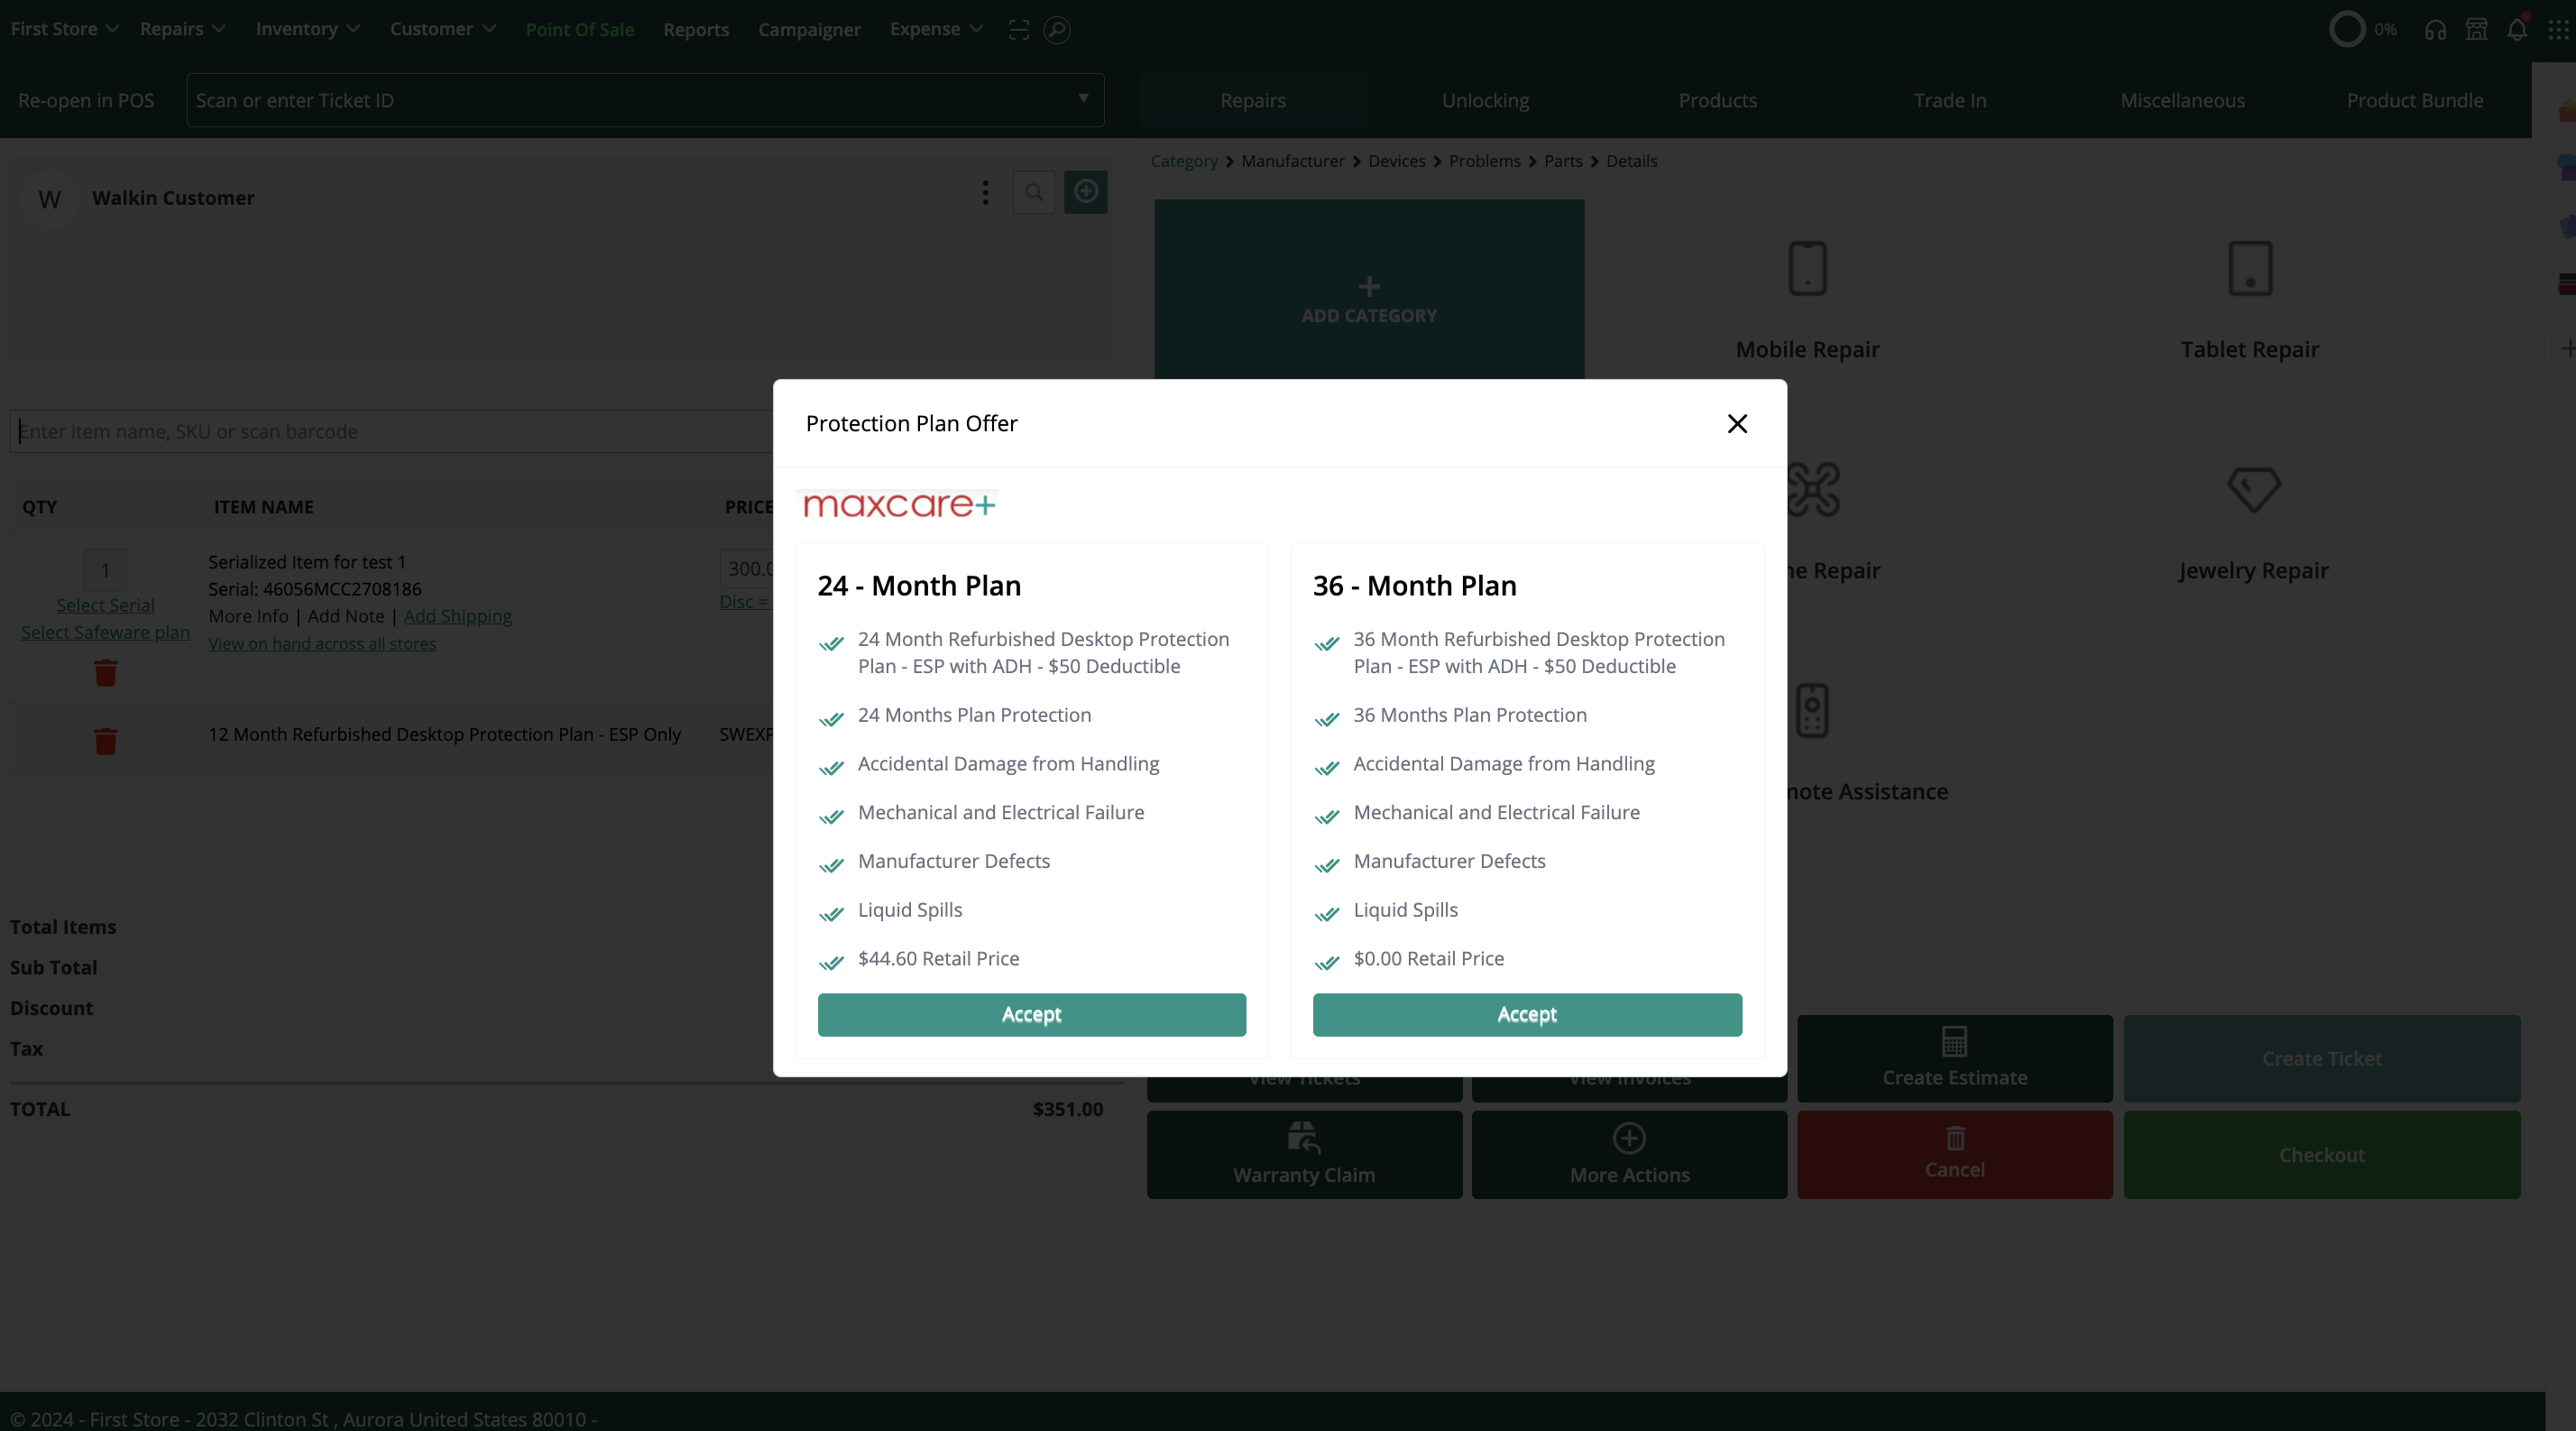
15. Select the plan you want to offer.Suppose you click on the Accept button of 36-month plan, you will be shown the 36 months ESP pricing right below the product line item.
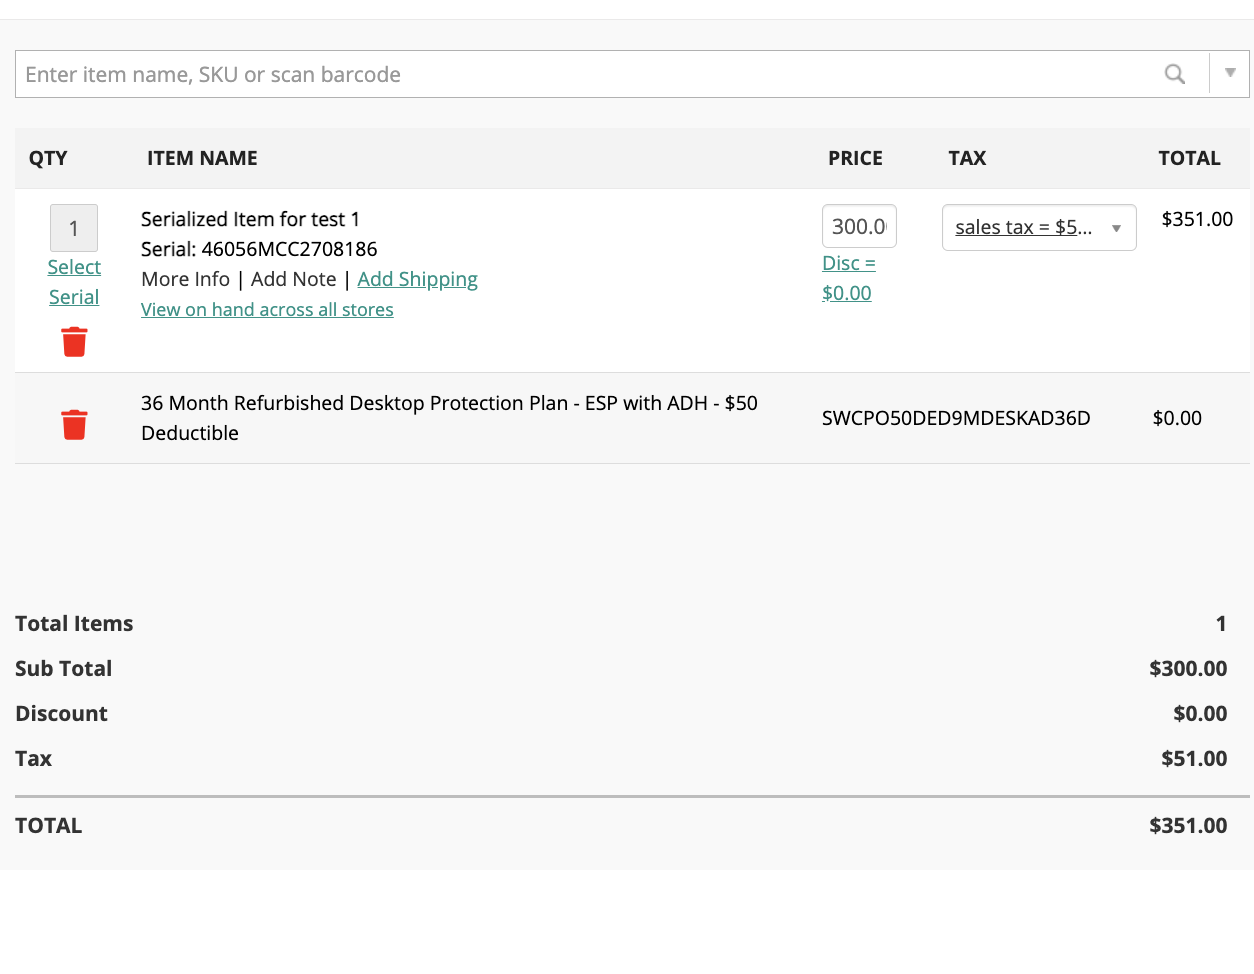
Note: if you wouldn’t set the retail price under the Safeware SKUs tab then the prices provided by the Safeware would be displayed in 12 months ESP.
16. You must need to enter the full information of the customer while selling the serials otherwise the system wouldn't let you generate the invoice, and you will receive an error message.
Note: If you would enter half of the customer information then it would result in synchronization issue
FAQ
Q. How to view coverage details of the items that are synchronized or failed?
A. You can either view it by going to manage invoices or by doing warranty claims on POS.
In manage invoices
Apply criteria to show Safeware invoices on a select criteria filter. After applying the criteria filter you will see another column of Safeware sync in the manage invoice section such as shown following
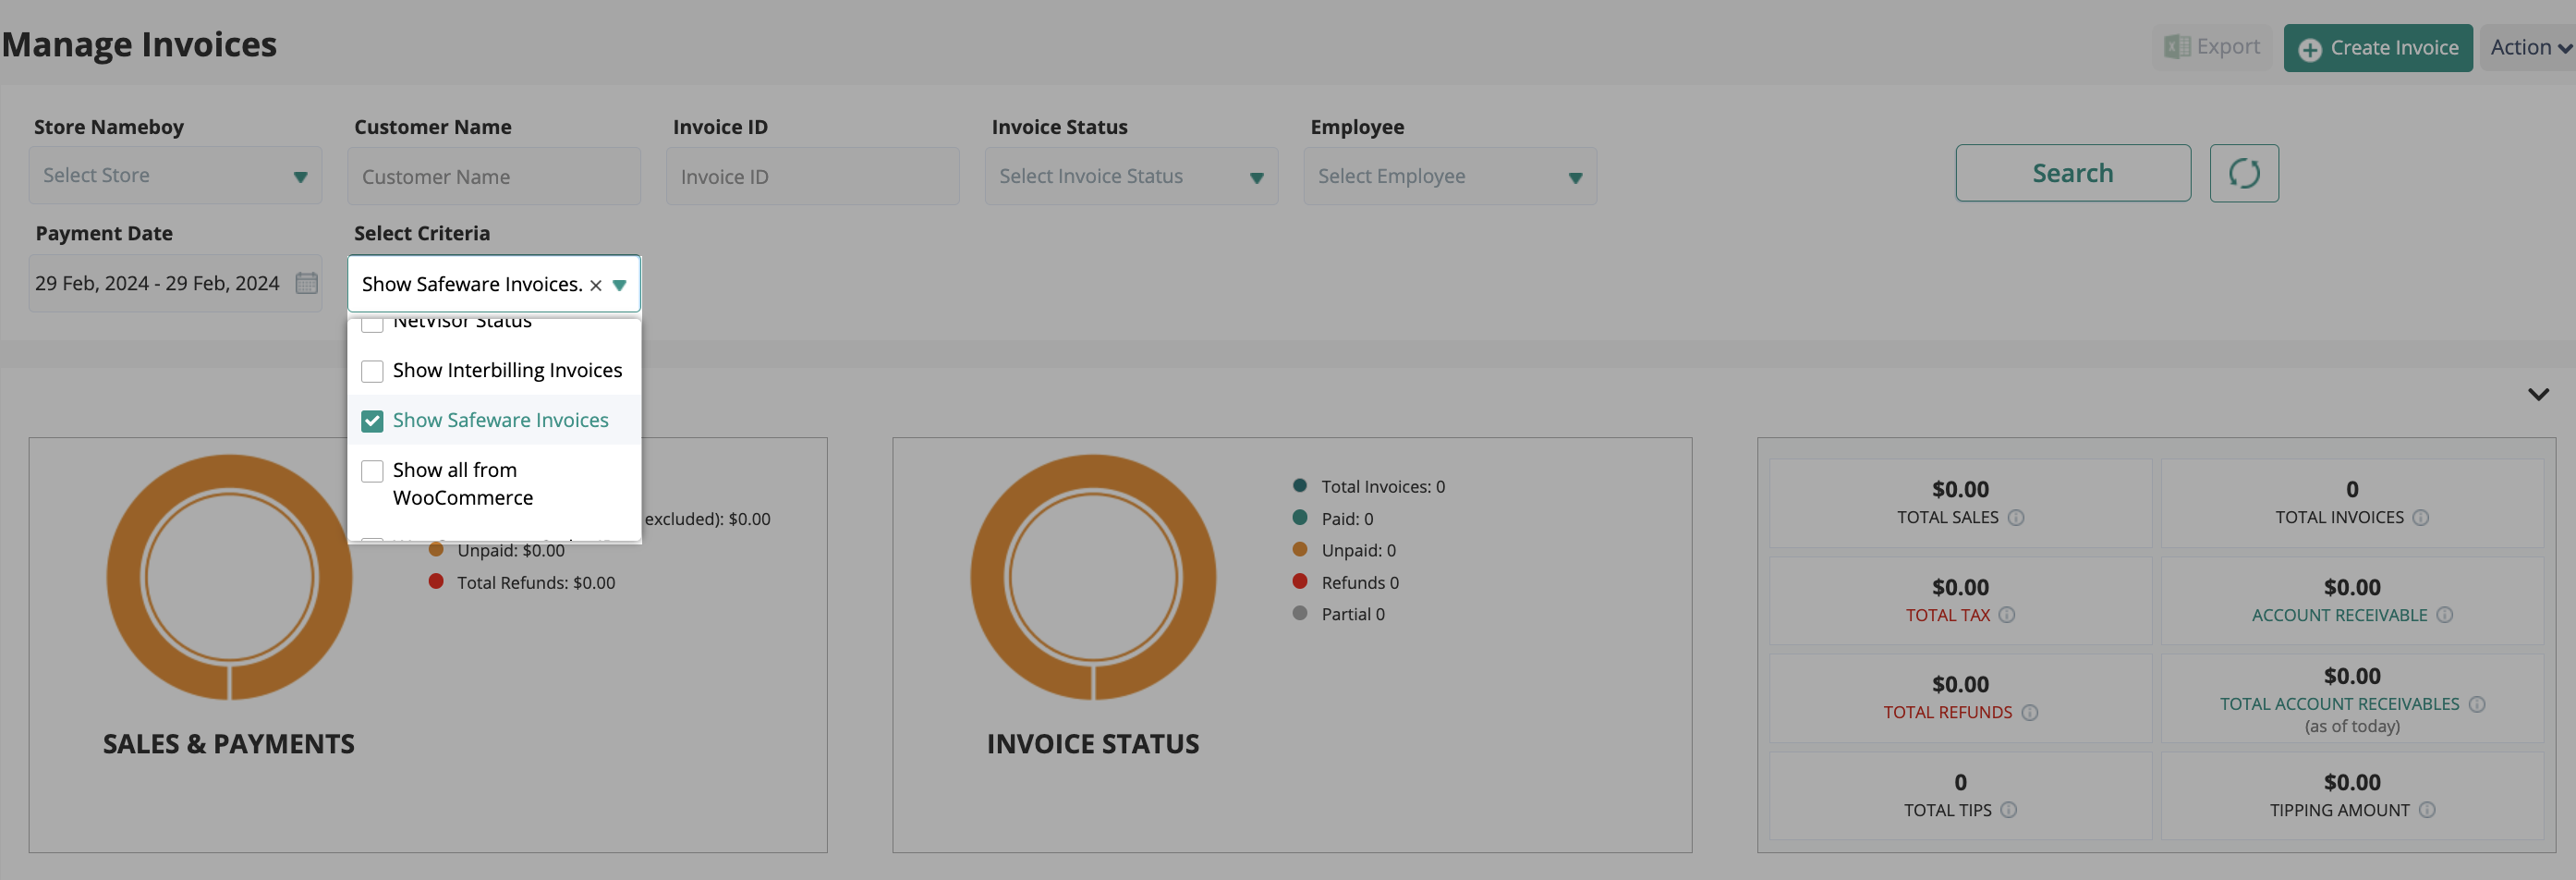
Click your desired invoice. After clicking on your desired invoice, you will be taken to the invoice page where you would be able to see the button 'Get Coverage Details'.

Clicking that button will bring a popup containing details

Q: Is category syncing and retail price setup store wise or business wise?
The category syncing and retail price setup can typically be configured store-wise rather than business-wise. This means that you can customize categories and retail prices independently for each store location within your RepairDesk account.
Q: Can I claim Safeware warranty from RepairDesk?RepairDesk is a point of sale and repair shop management software, while Safeware is a company that offers extended warranties for electronic devices. The process of claiming a Safeware warranty typically involves contacting Safeware directly and following their specific procedures for filing a warranty claim.
RepairDesk may have features or integrations that assist repair shops in managing warranty claims, including potentially tracking warranty information for devices sold or repaired through the software. However, RepairDesk itself does not handle the warranty claims process for Safeware or any other warranty provider.
