(For MacOS)
Steps to set up
To set up the printer, perform the series of simple steps as explained below
1. Head to Store Settings --> Hardware settings --> Direct Print Support
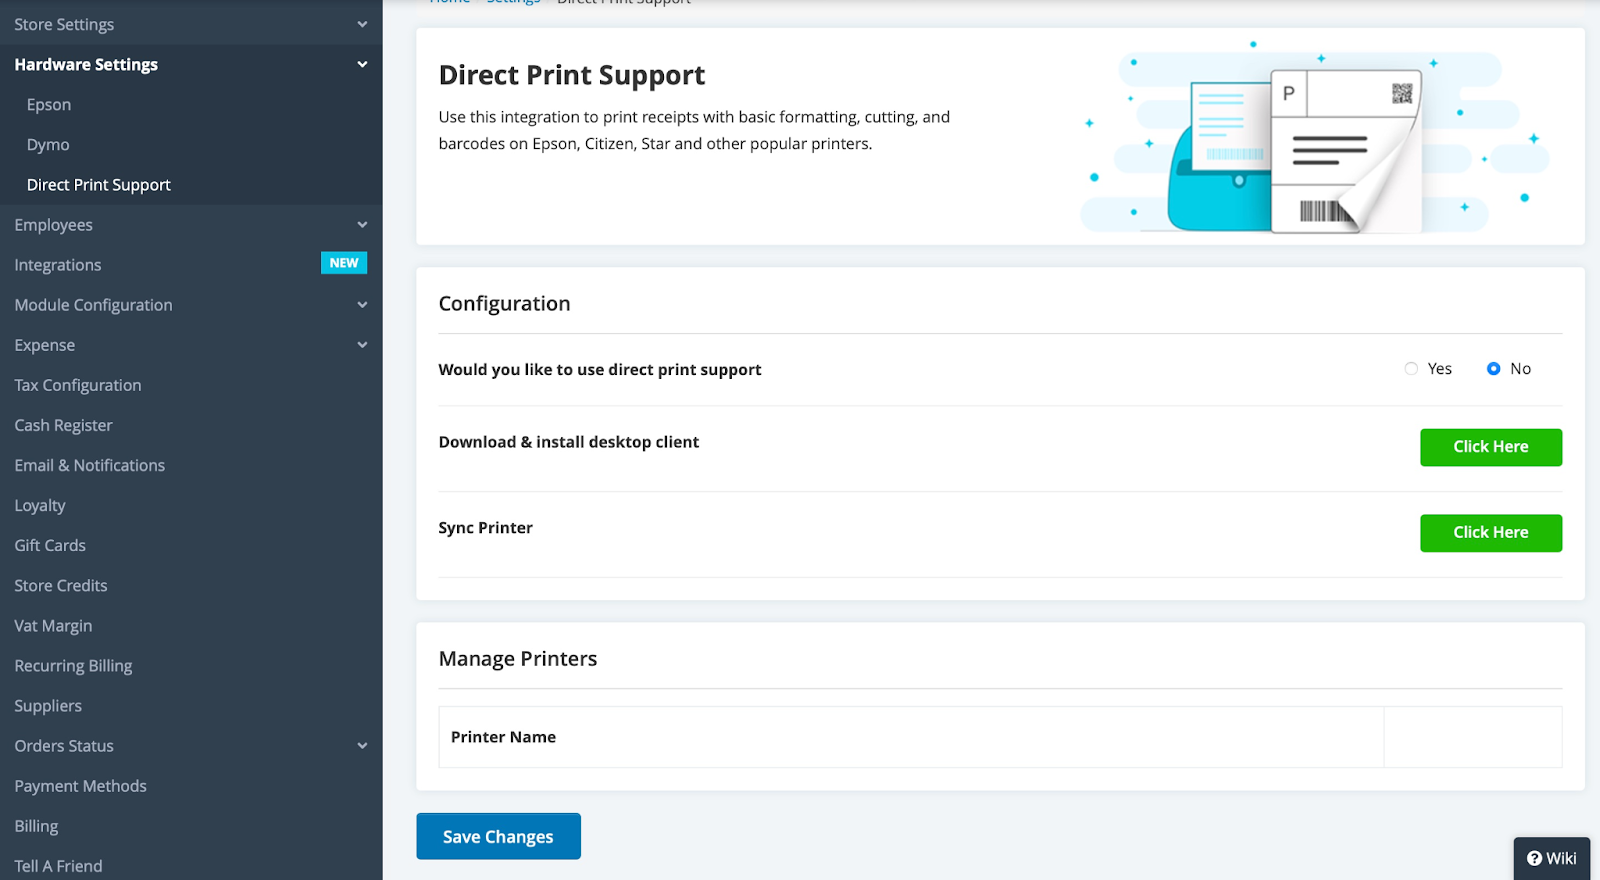
2. To enable direct print support, simply hit Yes against the option to print directly
3. To make direct print integration work, you will have to download and install QZ tray according to the OS being used.
Click on Click Here button and you will get the pop-up from where you can download and install QZ tray.

4. For QZ tray to work certain JDKs are required, click on Download button and your downloading would initiate
5. After downloading, click the installation icon  and you will get the following window.
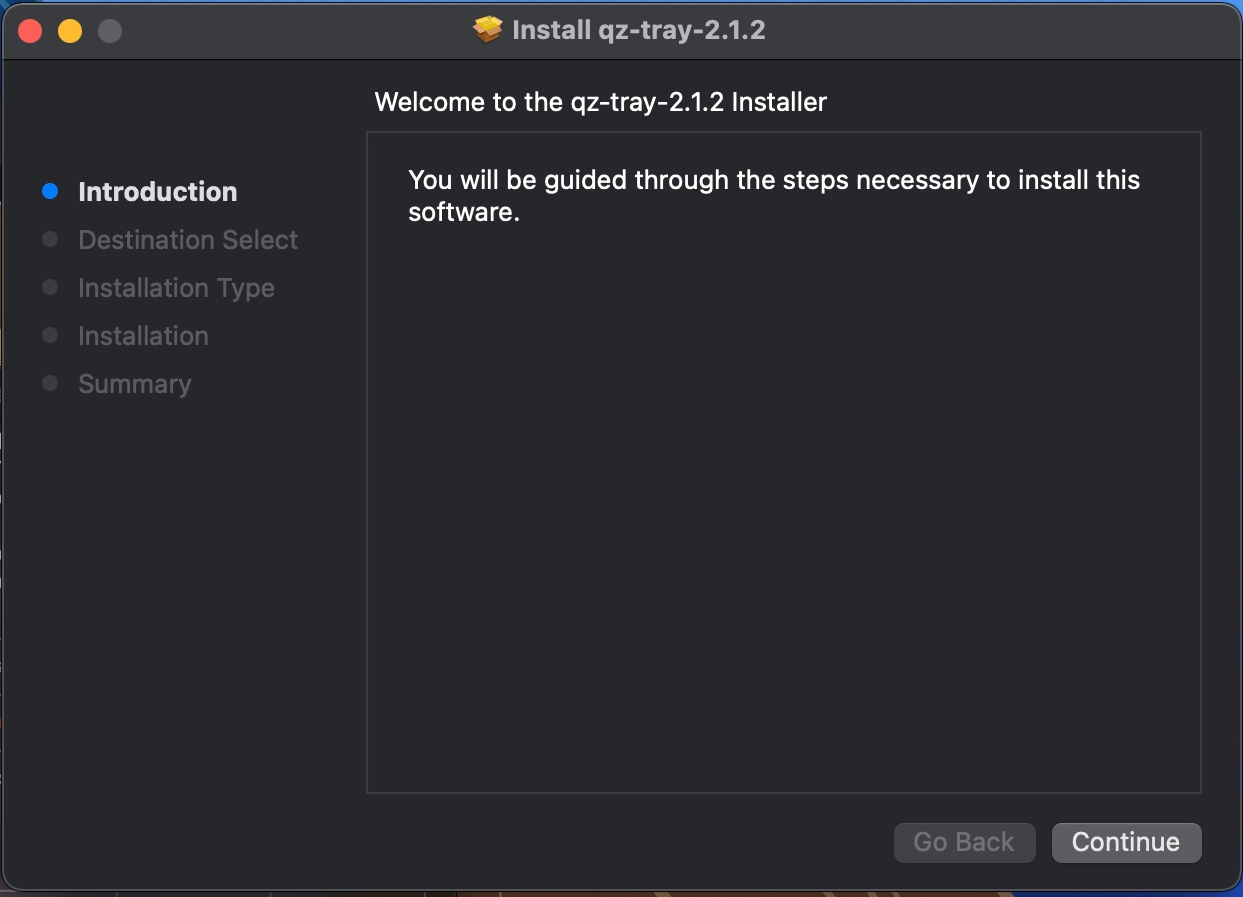
6.Click Continue and you will be directed to the following window.
By clicking Install, QZ tray will be installed by default path. To change the install location, please click "Change Install Location" to select the location.
You will be required to enter the user name and password and click on Install Software to continue. You will get the success message
7. After Successful installation of QZ tray and JDK, download Rongta driver.
8. Double-click the installation icon  after downloading the driver, you will get the following window.
Click Continue and you will be directed to the following window
By clicking Install, the driver will be installed by default path. To change the install location, please click "Change Install Location" to select the location
You will be required to enter the user name and password and click on Install Software to continue. You will get the success message.
Installing the USB Printer
When the drivers are installed successfully, the next step is to successfully install the printer
1. Head to System Preferences and open the window

2. Select Printers and Scanners

3. Click on the + icon as shown below

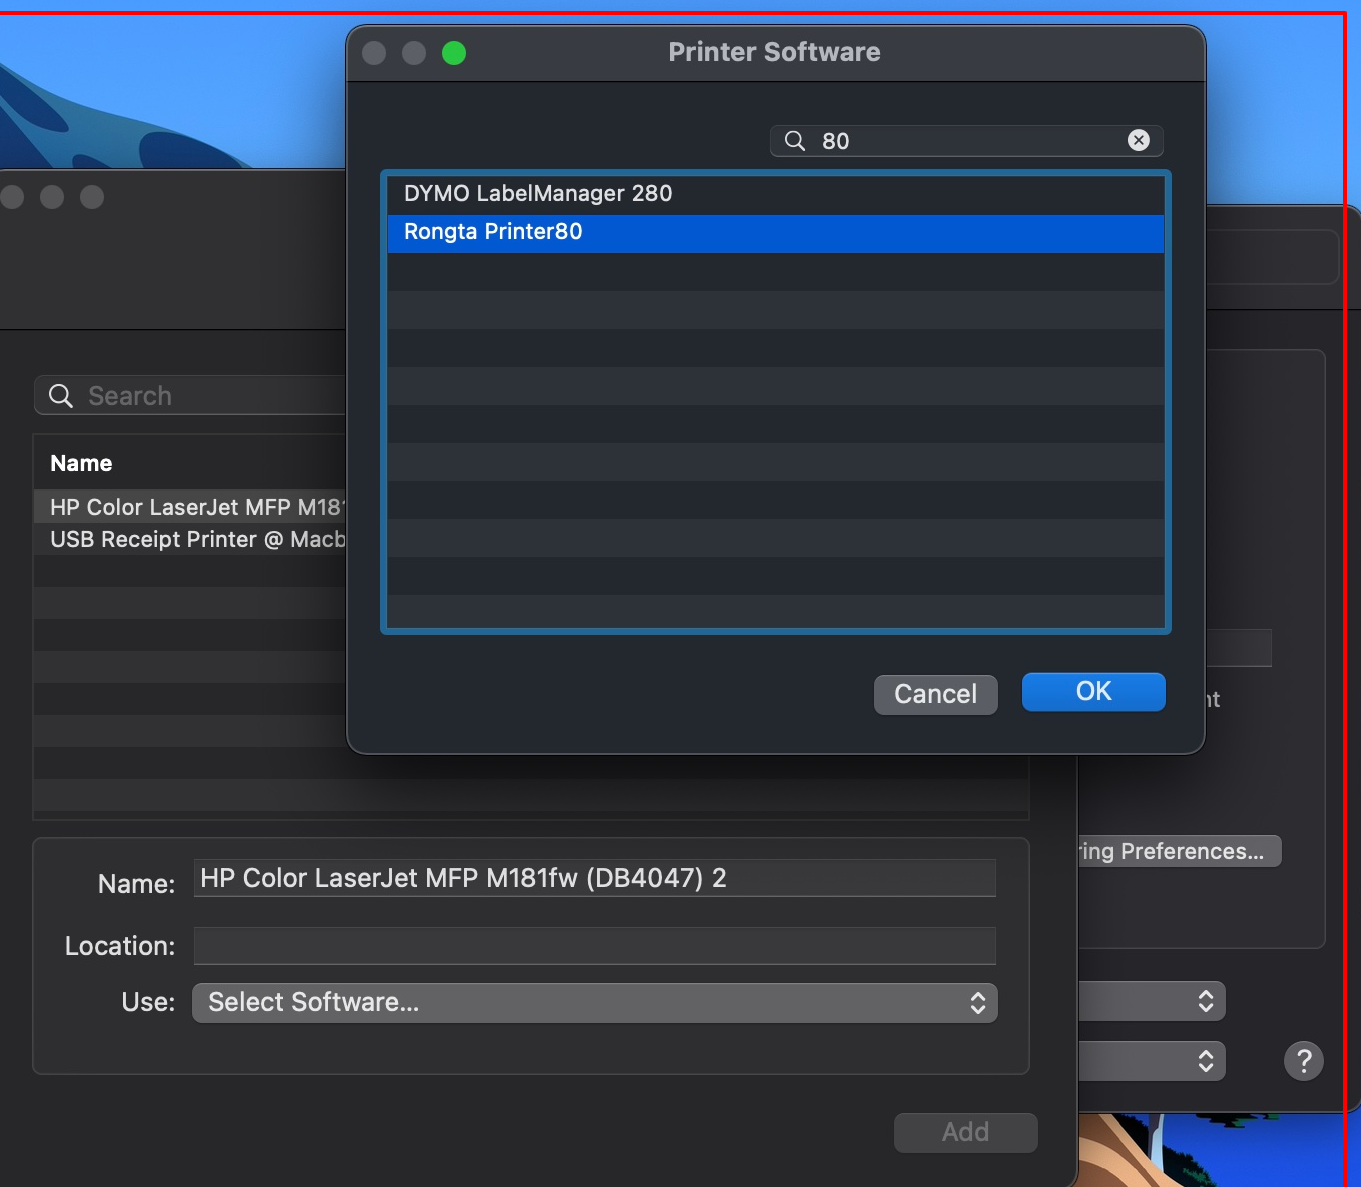
4. In the use field, select software as given in the screen below. Select Rongta Printer 80 and click OK. You can rename your printer as per your requirements
.
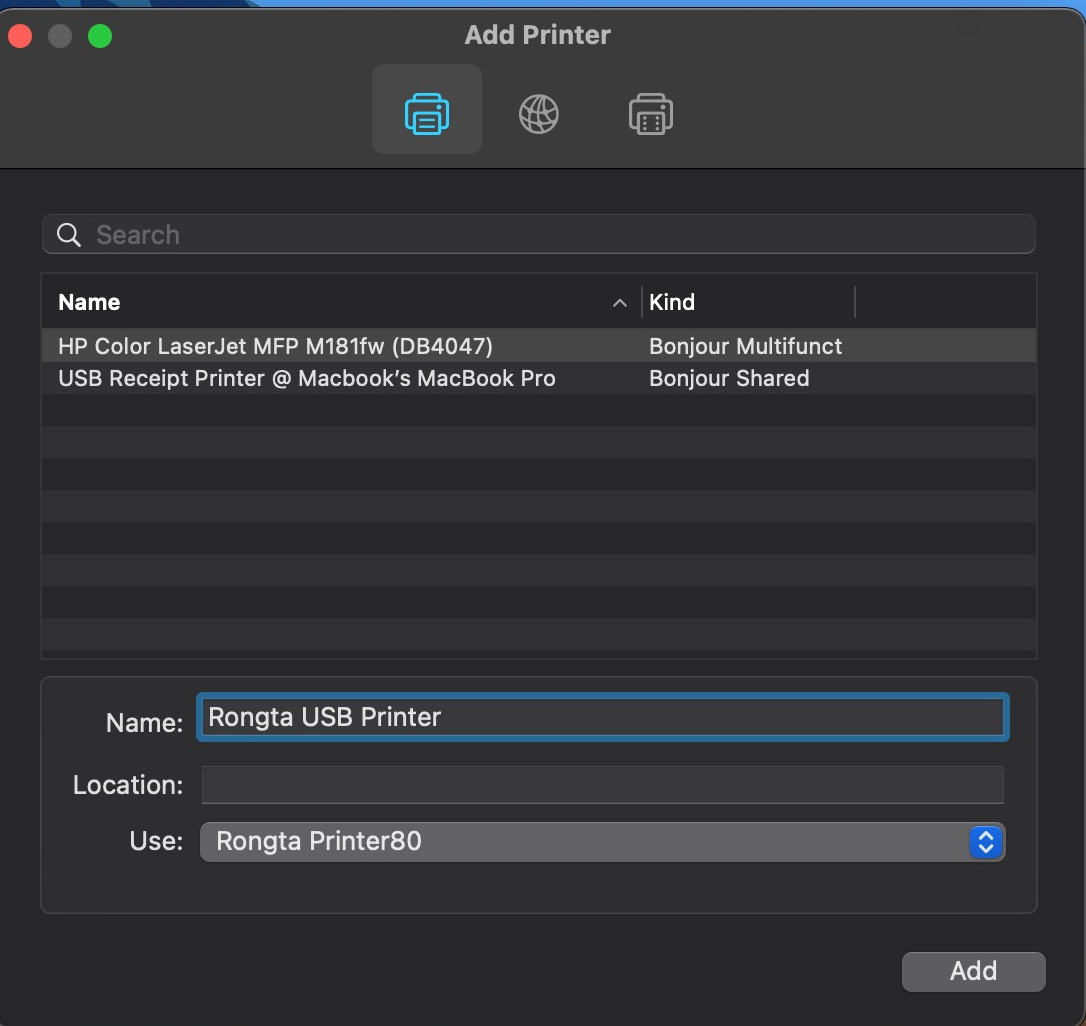
Click Add And USB Printer will be added.

5. After adding a printer on the system, go on localhost:631 from the browser and configure your printer with CUPS (CUPS allows your computer to work as a printer server).
 By clicking on Printers Tab you can see printers added on system and clicking on that specific printer you can see details of that printer.
Next step is to Sync all existing printers that are on the same network by hitting Click Here button
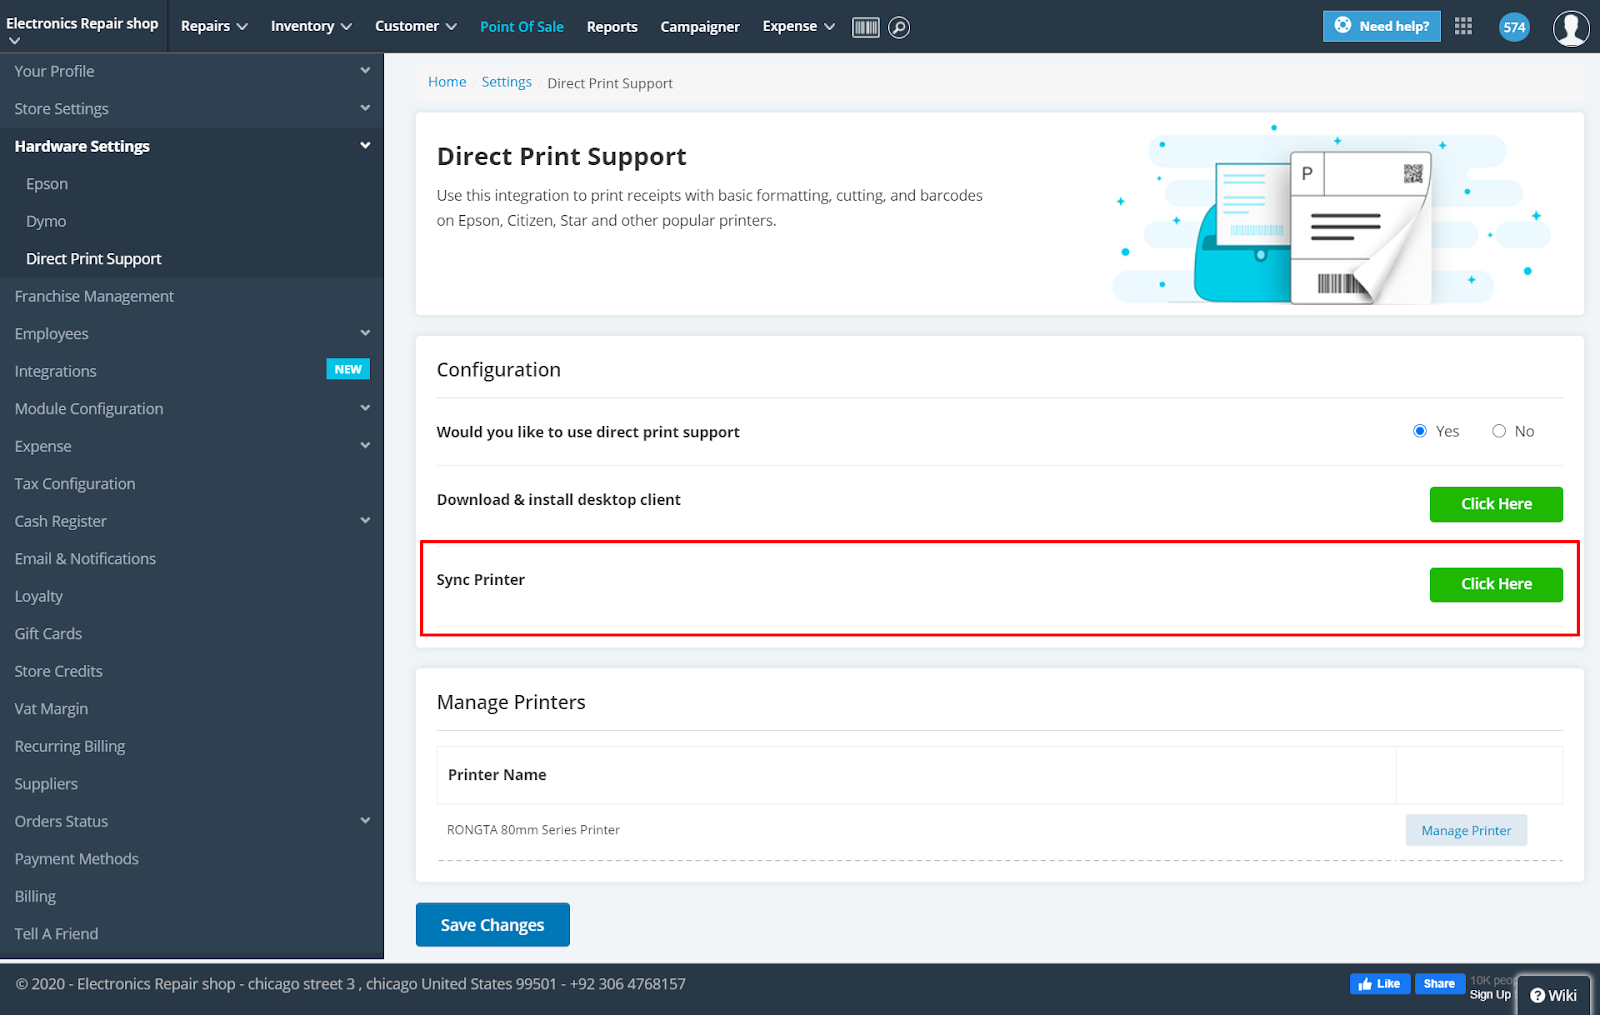 By hitting Click Here, all existing printers will be listed under the manage printers section as shown above.
By clicking on Manage Printers, you will be directed to the screen where you can set up the Rongta series printer.
(Installing the Ethernet Printer)
1. Head to System Preferences and open the window
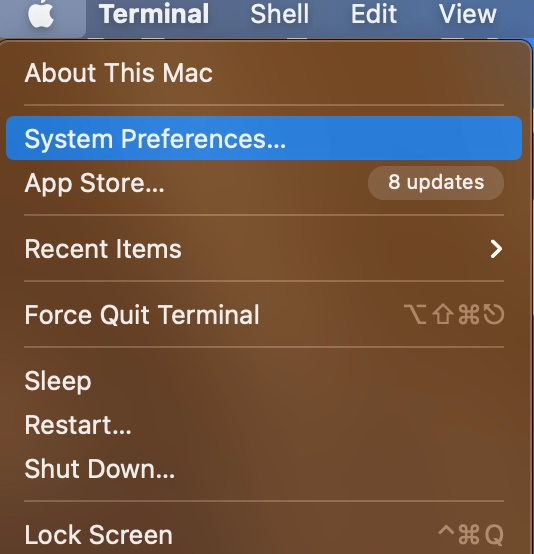
2. Select Printers and Scanners. Click on the + icon from the screen

3. Select  icon and you will get the following screen

 Enter the IP Address of the printer and change the protocol to HP Jetdirect Socket
 4. Select Use and change it to Select Software
 Select Rongta Printer 80 and hit OK.
 Click Add and the printer will be added successfully.
 5. After adding a printer on the system, go on localhost:631 from the browser and configure your printer with CUPS (CUPS allows your computer to work as a printer server).
 Next step is to Sync all existing printers that are on the same network by hitting Click Here button

By clicking on Manage Printers, you will be directed to following screen where you can set up the Rongta series printer

There you can select the printer type, map the printer with hardware, set interface type and paper size. Moreover you can set when you want to get direct prints from that printer and cash drawer settings.
Once the printer is set up and ready to use, whenever a repair ticket, estimate or invoice is created, it will be printed automatically depending upon the printer settings
