How To Enter & Track Expenses via Expense Management Module?
Every business encounters daily expenses. Recording each and every expense transaction is fundamental to get an actual financial picture of a business's expenditures. If these small expenses are not kept in check, soon they have a snowball effect, completely taking you by surprise when you are viewing your financial statements.
To effectively manage and record such expenses, RepairDesk has introduced Expense Management Module. The module will help you to define expense codes(categories), records transactions under these codes(categories) and get a full picture of expense transactions in the form of a report.
Let's get started!
1) Setting Up Expense Codes
Below are the Steps for setting up expense codes:
1. Go to Store Settings.
2. Click on Expense Tab and Click Expense Codes which will display all the Expense Codes.

3. To create a new expense code, click on Create Expense Code button.

4. You will be taken to another screen where you can add the following details for the Expense Code:
5. Once you have filled all details, click on the Save button to create the new expense code.
user have option to allow specific expense code to either for payroll or for expense Module or it can be used for both.

6. Once the Expense Code is saved, it will be available in the listing on the Manage Expense page.

user can enable specific code for the desired module based on its priority.
Setup for Role Permissions:
1. Go to store setting.
2. Click on Employee Tab and then click on Role Permission.

3. By clicking Roles permission, the following screen appears with all the roles related to different operations.
4. Select Role and click on Expense Management in the Modules section.
5. Expense Permissions :
.png "Image: https://repairdesk.uservoice.com/assets/194228623/RepairDesk%20INC%20%20%20Roles%20Permission%20(2).png")
4. Select SAVE, that will apply the permissions to the selected Role.
2) Creating Expense Transactions
1. To record an expense, click on Expense tab on the header menu and select Manage Expenses from the drop-down menu, or click Add button "+" to directly add an expense.

You will be able to view all expense transactions here. And their status either they are posted OR unposted(saved).

2. Yo can enter the expense from the Manage Expense report as well.

3. In the pop up of Expense Entry Window you have to enter the following info:

Note: If the shift is not started, you can enter the expense in the back date as well.
4. You can add multiple expenses under this expense category(code) by clicking on Add Row button. To remove an expense, click on the trash bin icon against the particular expense.
5. Click on the Save to just save the record - saved records can be edited and deleted based on role/permission.
OR
Save & Post to post the expense transaction - Posted transactions cannot be deleted.
Note: Save and Save & Post option will depend upon security assigned from Roles / Permissions.
7. Search filters are available, through which you can find the expense transaction, Date wise, Status wise, User wise and Expense code wise for the better control.

3) Expense Reports
1. To view the report of all expense transactions, go to Report in the Header menu.
2. Select Expense Report, here you will be able to view all expense transactions.

To narrow down your search you can click on Search Filter, select parameters such as :
Once Search button is clicked, records will be displayed according to the selected parameters. Clicking on the Reset button will remove all search filters.

Here you will see all expenses under their respective Expense Categories. Click on the "+" icon to view detail expenses under the selected Expense Category.

2. To download the report in CSV format, click on the CSV button as shown in the screenshot to download a CSV report of expense transaction to your system.

CSV preview:

Functionality:
Expense module will only be functional when the shift is start. And its effect in all the reports like that of manual out. Manual out and Expense will work parallel.
Reference transaction for expense and manual out is as follow:
4) FAQs
Q. Expense codes are business wise or store wise?
A: The expense codes are store wise, each store has its specific expenses and the store owner can define its store specific expense codes.
Q. How many expense codes can I create?
A: As many as you want, as per business need.
Q. Do we have unique expense codes?
A: Yes, each expense code is unique which is auto-generated. You can make your description as per business need.
Q. Can I disallow an expense code?
A: Yes, if you want to disable an expense code. Go to that expense code and mark it as disable for Store Expense.
Q. Can I set up multiple Method of Payments with one Expense Code?
A: Yes, you can specify the multiple Method of Payments with an expense code.
Q. Can I delete an expense code?
Answer: If the transaction exists for the expense than it cannot be deleted.
Q. Can I enter reason code with an expense entry?
A: Yes, reason code is mandatory.
Q. Can I create multiple expense lines for the same code?
A: Yes, you can do it by Add Row Button.
Q. Can we delete an expense entry?
A: If the user has Save & Posted the Expense Entry, it cannot be deleted. If the user has saved the expense entry, it can be deleted (bases on Roles/Permission setup).
Q. Can I report expense w.r.t Expense Codes, Dates and Status?
A: Yes, you can generate the expense report on base of Expense Dates, Expense Codes, Created By and Status (Posted or Unposted).
Q. Can I add expense without Starting shift?
A: Yes! You can add the expense without starting the shift. You can also change the date when adding the expense (if the shift is not started).
Q. At the time of ending shift, if there are some unposted expense what will happen to those entries?
A: At the time of ending shift, this popup will appear by clicking Post All all the unposted expense will be posted, by clicking Proceed Anyway unposted entries will have no effect on reports and by clicking Cancel you will back to RepairDesk and shift will not end.

Q. Can we change or update the unposted expense once the shift has ended?
A: No once the shift is ended you can neither change nor update the unposted entries.
Q Who can manage expenses (update/void), and what restrictions apply?
A Only Admin/Super Admin users have full control over expenses. They can update and void any expense. Other users with expense management permissions can see the update and void options, but they will be disabled with a message: "Only the admin user is allowed to perform this action." The ability to update or void an expense also depends on the associated shift register:
- No Shift Register or Shift Register Open: Expenses can be updated or voided freely.
- Shift Register Closed: Expenses can only be voided; updates are not permitted.
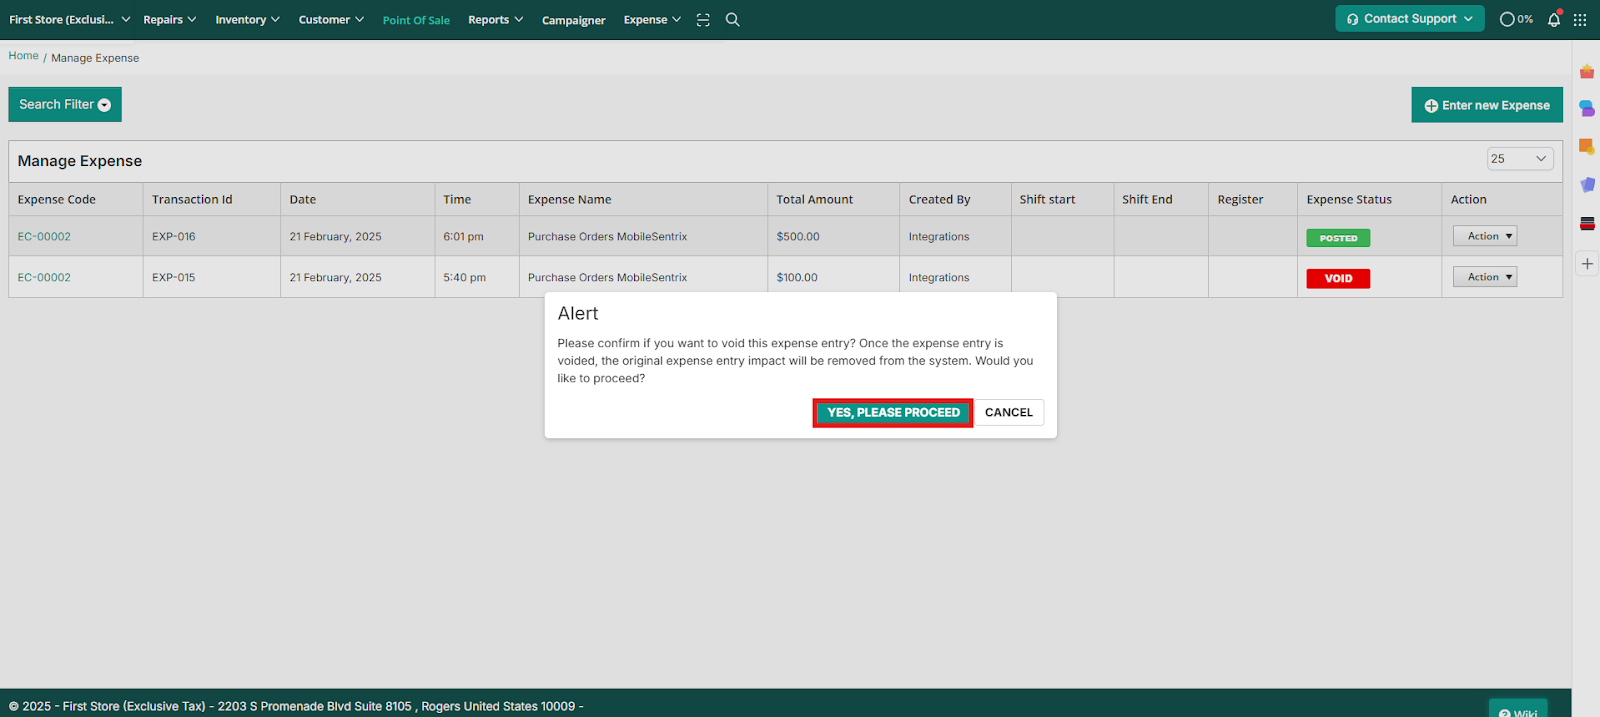
Q How do I update or void an expense, and what are the consequences of voiding?