Click Save Changes after configuring General Settings.

Manage Shipping in Tickets
Shipping can be managed in tickets through following scenarios:
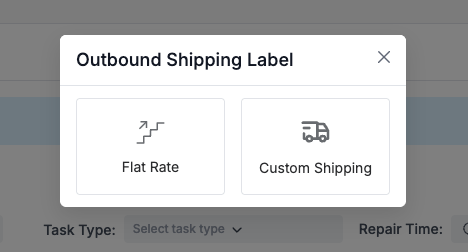
Scenario 1
1- Choose Custom Shipping
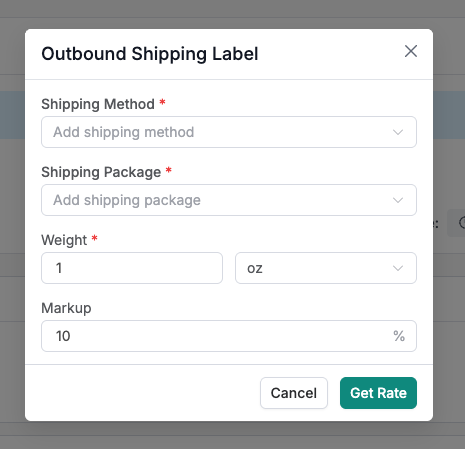
2. Fill in the relevant information
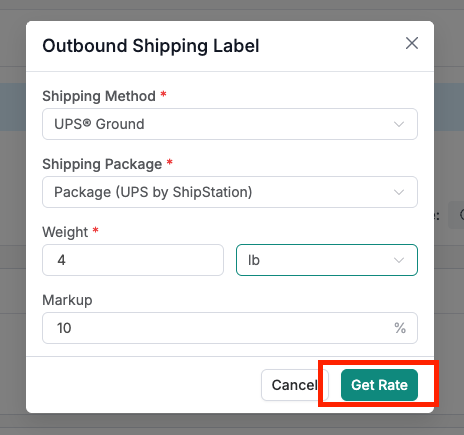
3. Tap Get Rate
4. Select whether you want to charge Shipment Cost to customer
4. Tap Get Another Rate with different details Or Add Shipping
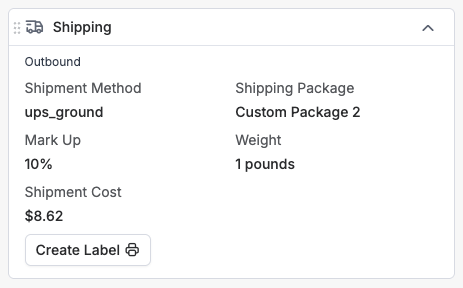
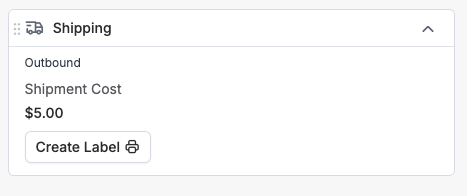
5. The Shipping details will populate in the Shipping Card on the right hand side and the Total Amount will reflect in the Billing Card.
Scenario 2:
1- Choose Flat Rate
2- Shipping card will be added in the right hand section and the total amount will reflect in the Billing Card.
Scenario 3:
1. Both markup and flat rate are configured from General Settings
Once a ticket is created, you can add shipment by clicking on “Edit Ticket”.
- If you click flat rate, a line item will be added directly.
- If you click Custom Shipping, the Shipping Details popup will appear where you can add shipping details and click “Add Shipment”.
Note: Shipping labels are not generated in RepairDesk in case of flat rate. They will only be generated through ShipStation.
Manage Shipping in Invoices
Shipping can be managed in invoices through following scenarios:
Scenario 1: Only markup is configured from General Settings
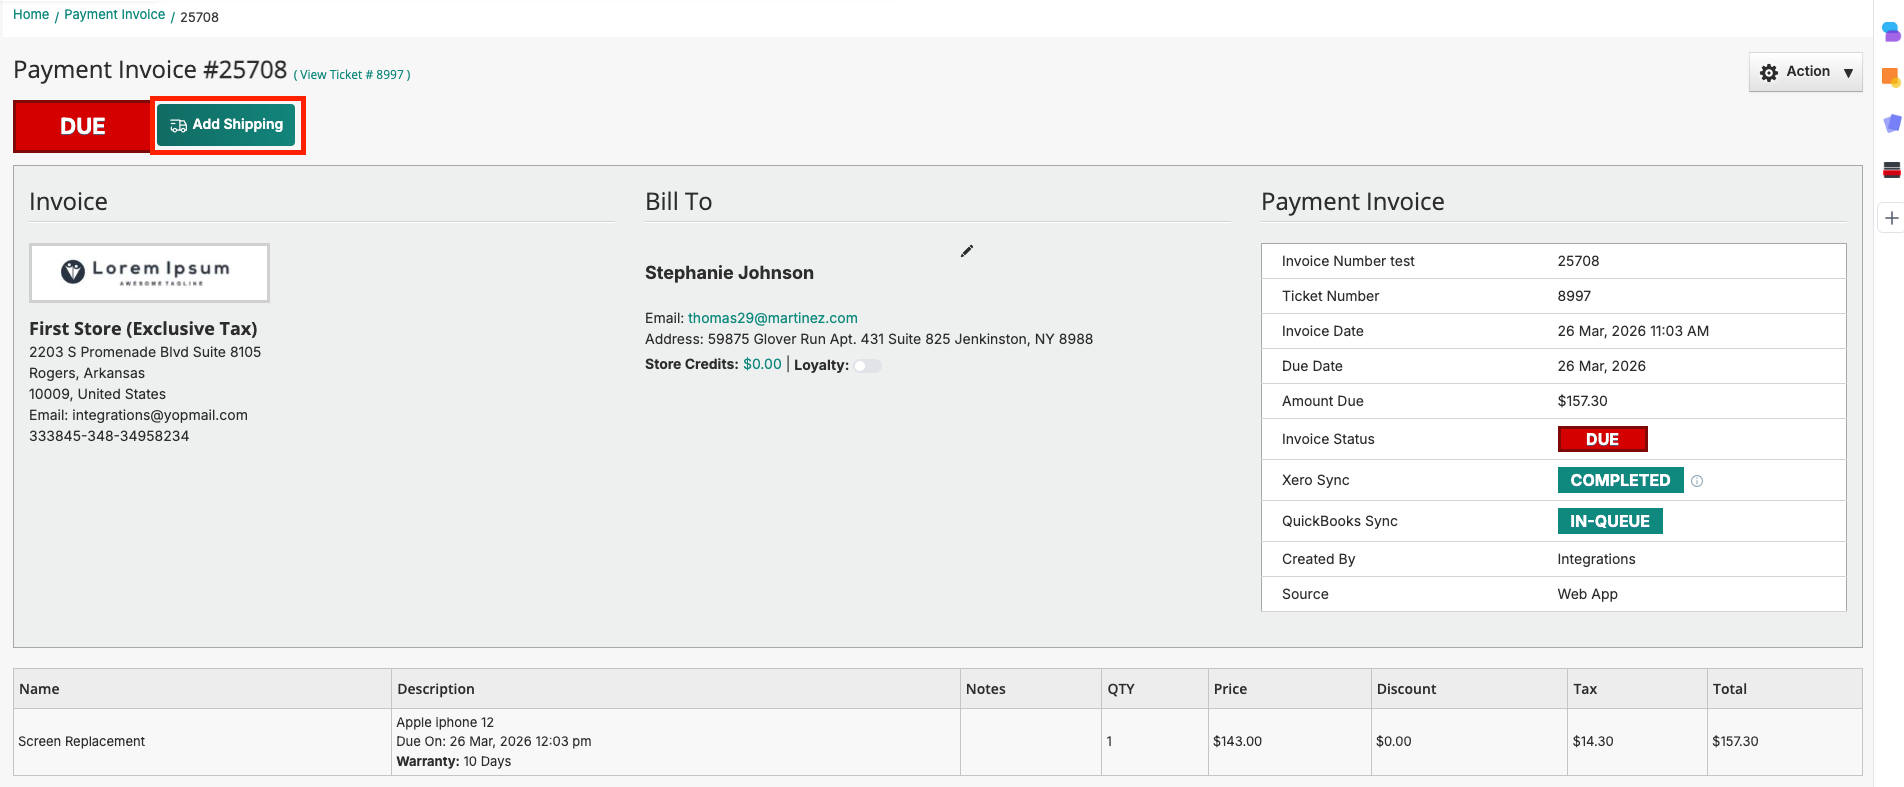
Once an invoice is created, Click “Add Shipping” to create a shipment.

Following are the steps you can follow to add shipment:
- Choose Shipping Method
Add Shipping Package
In case of Custom Shipping Package, add its length and width as well.
- Add weight
- Add Markup
- In order to check the shipment rate click “Get rate”.
- Once you have the shipment rate click “Create Shipment” to add it in the total.
- In case you wish to check another shipment rate, you can click “Get another rate.
- If you wish to charge shipment cost to customer you can check the box.
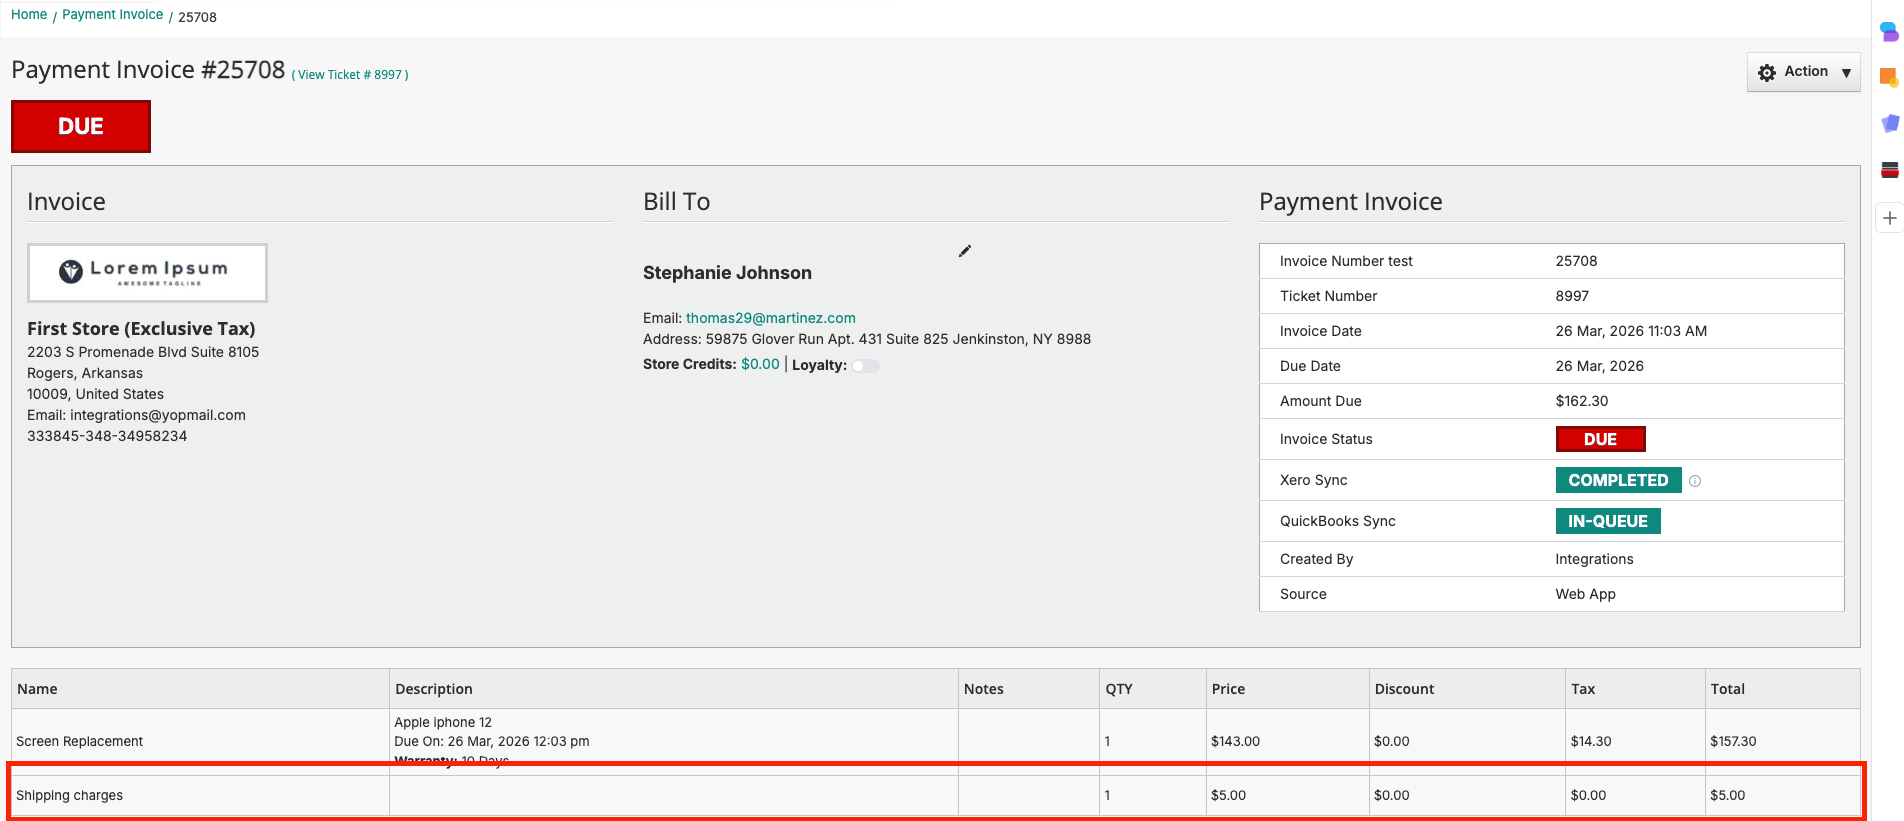
After the shipment is added, it will appear as a line item in the invoice as shown below:
Shipment will be added in the total of the invoice.

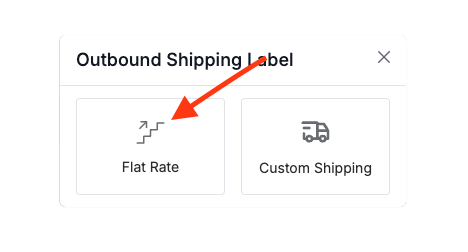
Scenario 2: Only flat rate is configured from General Settings
Once an invoice is created, Click “Add Shipping” to create a shipment.
Once you click add shipping, a line item will be populated as shown below:
Scenario 3: Both markup and flat rate are configured from General Settings
Once an invoice is created, Click “Add Shipping” to create a shipment.
- If you click flat rate, a line item will be added directly.
If you click Custom Shipping, the Shipping Details popup will appear where you can add shipping details and click “Add Shipment”.
Shipping Settings
Shipping Methods
To configure shipping methods, click the drop down as shown below. The shipping carriers will be populated from your ShipStation account.
The carriers you select will be automatically populated in POS, ticket or invoice wherever you will be adding shipment. You can uncheck the carriers you do not wish to add in the shipment options.
Shipping Packages
Here, you can choose from a selection of carrier boxes or create your own custom package to use in ticket or an invoice. The shipping boxes will be populated from your ShipStation account. The boxes you select will be automatically populated in the ticket or invoice wherever you will be adding shipment.
You can uncheck the boxes you do not wish to add in the shipment options.
Click Save Changes after configuring Shipping Methods and Packages.
Click Save Changes after
configuring Shipping Methods and Boxes.
Email Notification
With email notification, you can send emails to your customer when tracking id is generated if the toggle is on. A default email template as well as email subject is set which are editable as per your choice. Once you turn on the toggle, save any changes you make in the template and subject area.
In order to view shipping in invoices on customer portal please follow the following path:
Manage customer → Customer Name → Portal Link → Invoices
FAQs
Q - Who is ShipStation for?
A - ShipStation is a shipping and
order fulfillment platform that is designed to meet the needs of a wide range
of e-commerce businesses, from small and medium-sized merchants to large
enterprises. The platform offers a variety of features and tools to help
merchants streamline their shipping and fulfillment processes, including
integration with major marketplaces and shopping carts, customizable shipping
rules, batch shipping, label printing, and real-time tracking.
ShipStation also offers support for
multiple carriers, so businesses can choose the shipping options that best meet
their needs. Additionally, the platform has a range of plans that can be
customized to fit the specific needs of each business, making it a flexible and
scalable solution for businesses of all sizes.
Q - Where can I use ShipStation?
A - ShipStation offers accounts in
the United States, Canada, the United Kingdom, Australia, New
Zealand, France, and Germany currently. When
creating labels in a ShipStation account, your Ship From Location (that
is, where your shipments originate) must match your account's home country.
Q - Does ShipStation ship products
for customers?
A - No, ShipStation is not a carrier
or shipping company. ShipStation is a Software as a Service (SaaS) platform
where you can connect your carrier and postage provider accounts, so you can
create the labels for your parcels. All parcels are shipped by your individual
carrier and postage providers.
Q - Which Shipping carriers are
integrated with ShipStation?
A - It is specific to the account home
country. In order to learn more about shipping carrier integrations with
ShipStation according to your country, please follow this link.
However, below is a list of current
carrier and postage provider integrations available within ShipStation.
Access Worldwide
APC
Asendia
DHL eCommerce
DHL Express
Endicia
ePost Global (formerly RR Donnelley)
FedEx
FedEx SmartPost
FirstMile
Fulfillment by Amazon (FBA)
GlobalPost
Globegistics
GLS
IMEX
Landmark Global
LSO
Newgistics
OnTrac
SEKO
Stamps.com
UPS
UPS SurePost®
UPS Mail Innovations
Q - Does ShipStation support drop shipping?
A - Yes, it does.
Q - Can I edit shipping once an
invoice is paid?
A - No, shipping cannot be added
once an invoice is paid.
Q - Can I view shipping in the
customer portal?
A - Yes, you can view it in the
customer portal in both the invoices and tickets. Please follow the user guide
to know more about it.
Q - If I refund the invoice from RepairDesk, will it be displayed on ShipStation?
A - No, the refunded invoice will not be displayed on ShipStation.
Q - Can I create shipping label if I have chosen custom package?
A - No, you cannot. Custom packages only help you sync the package data with ShipStation. In this case label is generated from ShipStation not RepairDesk.
Q - Can I add shipping to a paid invoice?
A - Yes, you can add shipping to a paid invoice. However, once an invoice is paid, the shipping line item will not be visible on the invoice. Instead, the order can be viewed in the "Awaiting Shipment" section of ShipStation. Label can, then, be generated from both RepairDesk or ShipStation.
Note: Flat rate cannot be applied to a paid invoice.
Q - How to enable two-way syncing in ShipStation?
A - Go to Shipstation Account-->Setting --> Integrations --> Integrations Partners --> Web hook and add a new web hook.
Q - How will I print labels
with ShipStation Integration?
A - Once an invoice is created, you can print label from both RepairDesk and ShipStation. Both are shown below:
Q. Which API does RepairDesk use?
RepairDesk uses the V1 API.
Q. How should I update my API credentials in RepairDesk?
To update your API credentials in RepairDesk:
1- Go to ShipStation > Settings > Accounts > API Settings.
2- Then, select the V1 API version from the dropdown
3- Click on the Generate API Key button
4- Choose a duration (e.g., 12 months), and generate the keys.
5- The API Key and Secret Key will now be visible. Please copy and paste them into the RepairDesk ShipStation settings.


.png "Image: https://d1ivv9tj0dbuhh.cloudfront.net/uservoice-assets/Untitled (2).png")
.png "Image: https://d1ivv9tj0dbuhh.cloudfront.net/uservoice-assets/Untitled (3).png")


