Manage Invoices

Manage Invoices

Overview

Managing invoices can sometimes feel like a daunting task, but it is an indispensable part of running a business. Accurately calculating revenues and filing taxes relies heavily on having a well-organized system for managing invoices.
In this article, we will provide you with step-by-step instructions on how to effectively manage your invoices using RepairDesk.

1. Access

To access the invoice management feature in RepairDesk, follow these steps:
Access Invoice Management
  • On the header, click on "Repairs" and select "Manage Invoices" from the list.
  • You will be redirected to the main listing page of invoices.
  • From here, you can sort invoices, search for specific ones using the search filter, create new invoices, export invoices as CSV files, perform actions on single or multiple invoices, and view the status of invoices through graphical representations.

2. Search Filter

You can easily search invoices by using the powerful search filter in RepairDesk:
Search Filter
  • On the Manage Invoices screen, interact with the search filter portion.
  • Enter relevant parameters in the provided fields.
    • Customer Name: This filter allows you to search for invoices by customer name.
    • Invoice ID: This filter allows you to search for invoices by the invoice number.
    • Invoice Status: This filter allows you to search for invoices by their status.
      • Partial
      • Paid
      • Refunded
      • Unpaid
      • Overpaid
    • Employee: This filter allows you to select an employee responsible for the invoice.
    • Date: You can specify a single date or range of dates.
    • Payment Date: Filter by payment date range or single date.
    • Select Criteria: Choose the relevant payment criteria.
  • Click the 'Search' button.
For example, you could search for all invoices for a customer named "John Smith" that were generated between January 1st, 2023 and March 31st, 2023.
The search filters are a powerful tool that can help you to find the invoices that you are looking for quickly and easily.

3. Graphical Representation

In the Manage Invoices section, RepairDesk provides two graphical charts along with statistics to give you a comprehensive view of your revenue stream:
A. Payments: This graph shows the number of invoices received, currently due, and pending. It provides visibility into cash flow and helps track outstanding payments.
B. Status: This graph categorizes invoices by their payment status.
C. Stats: Insights into outstanding revenue amounts and tax collected.
  • Total Sales: Total revenue from sales.
  • Total Invoices: Total number of created invoices.
  • Total Tax: Total tax collected.
  • Account Receivable: Total money owed to the business.
  • Total Refunds: Money refunded to customers.
  • Total Account Receivables (as of today): Current outstanding receivables.
  • Total Tips: Total tips received by employees.
  • Tipping Amount: Tips given to employees on the current day.

4. Export Invoices

RepairDesk allows you to export invoices as CSV files:

Click on the "Export Invoices" option.

Export Invoices
  • A CSV file containing key details about each invoice will be automatically downloaded to your system.

5. Create a New Invoice

In addition to automatically generating invoices for transactions or tickets processed via POS and checkout, RepairDesk allows you to manually create invoices:

Go to the Manage Invoices screen and click on the "Create Invoice" button.

Create Invoice
  • You will be redirected to a screen where you can enter relevant information such as customer details, product information, and order details.
Invoice Form
  • Details of the fields are as followed:
    • Payment Invoice Number: Click the pen icon to edit the invoice number.
    • Customer: Search or add a customer using the 'New' button. Add notes using 'Notes'.
    • Order Date: Date the order was placed.
    • Due Date: Date the payment is due.
    • P.O/S.O: Purchase or sales order number.
    • SLOAGN: Service level agreement number.
    • FOOTER: Includes contact info, payment terms, and legal details.
    • Terms & Conditions: Payment terms, warranties, and legal policies.
  • Once all necessary information is added, click "Save" to create the invoice.
Save Invoice
  • You can also create an invoice from the ticket screen. (Refer to Manage Tickets Article)

6. Perform Action on Multiple Invoices

RepairDesk enables you to perform actions on invoices. Click on the action button on the top:
Actions Dropdown
Dropdown will show the following actions:
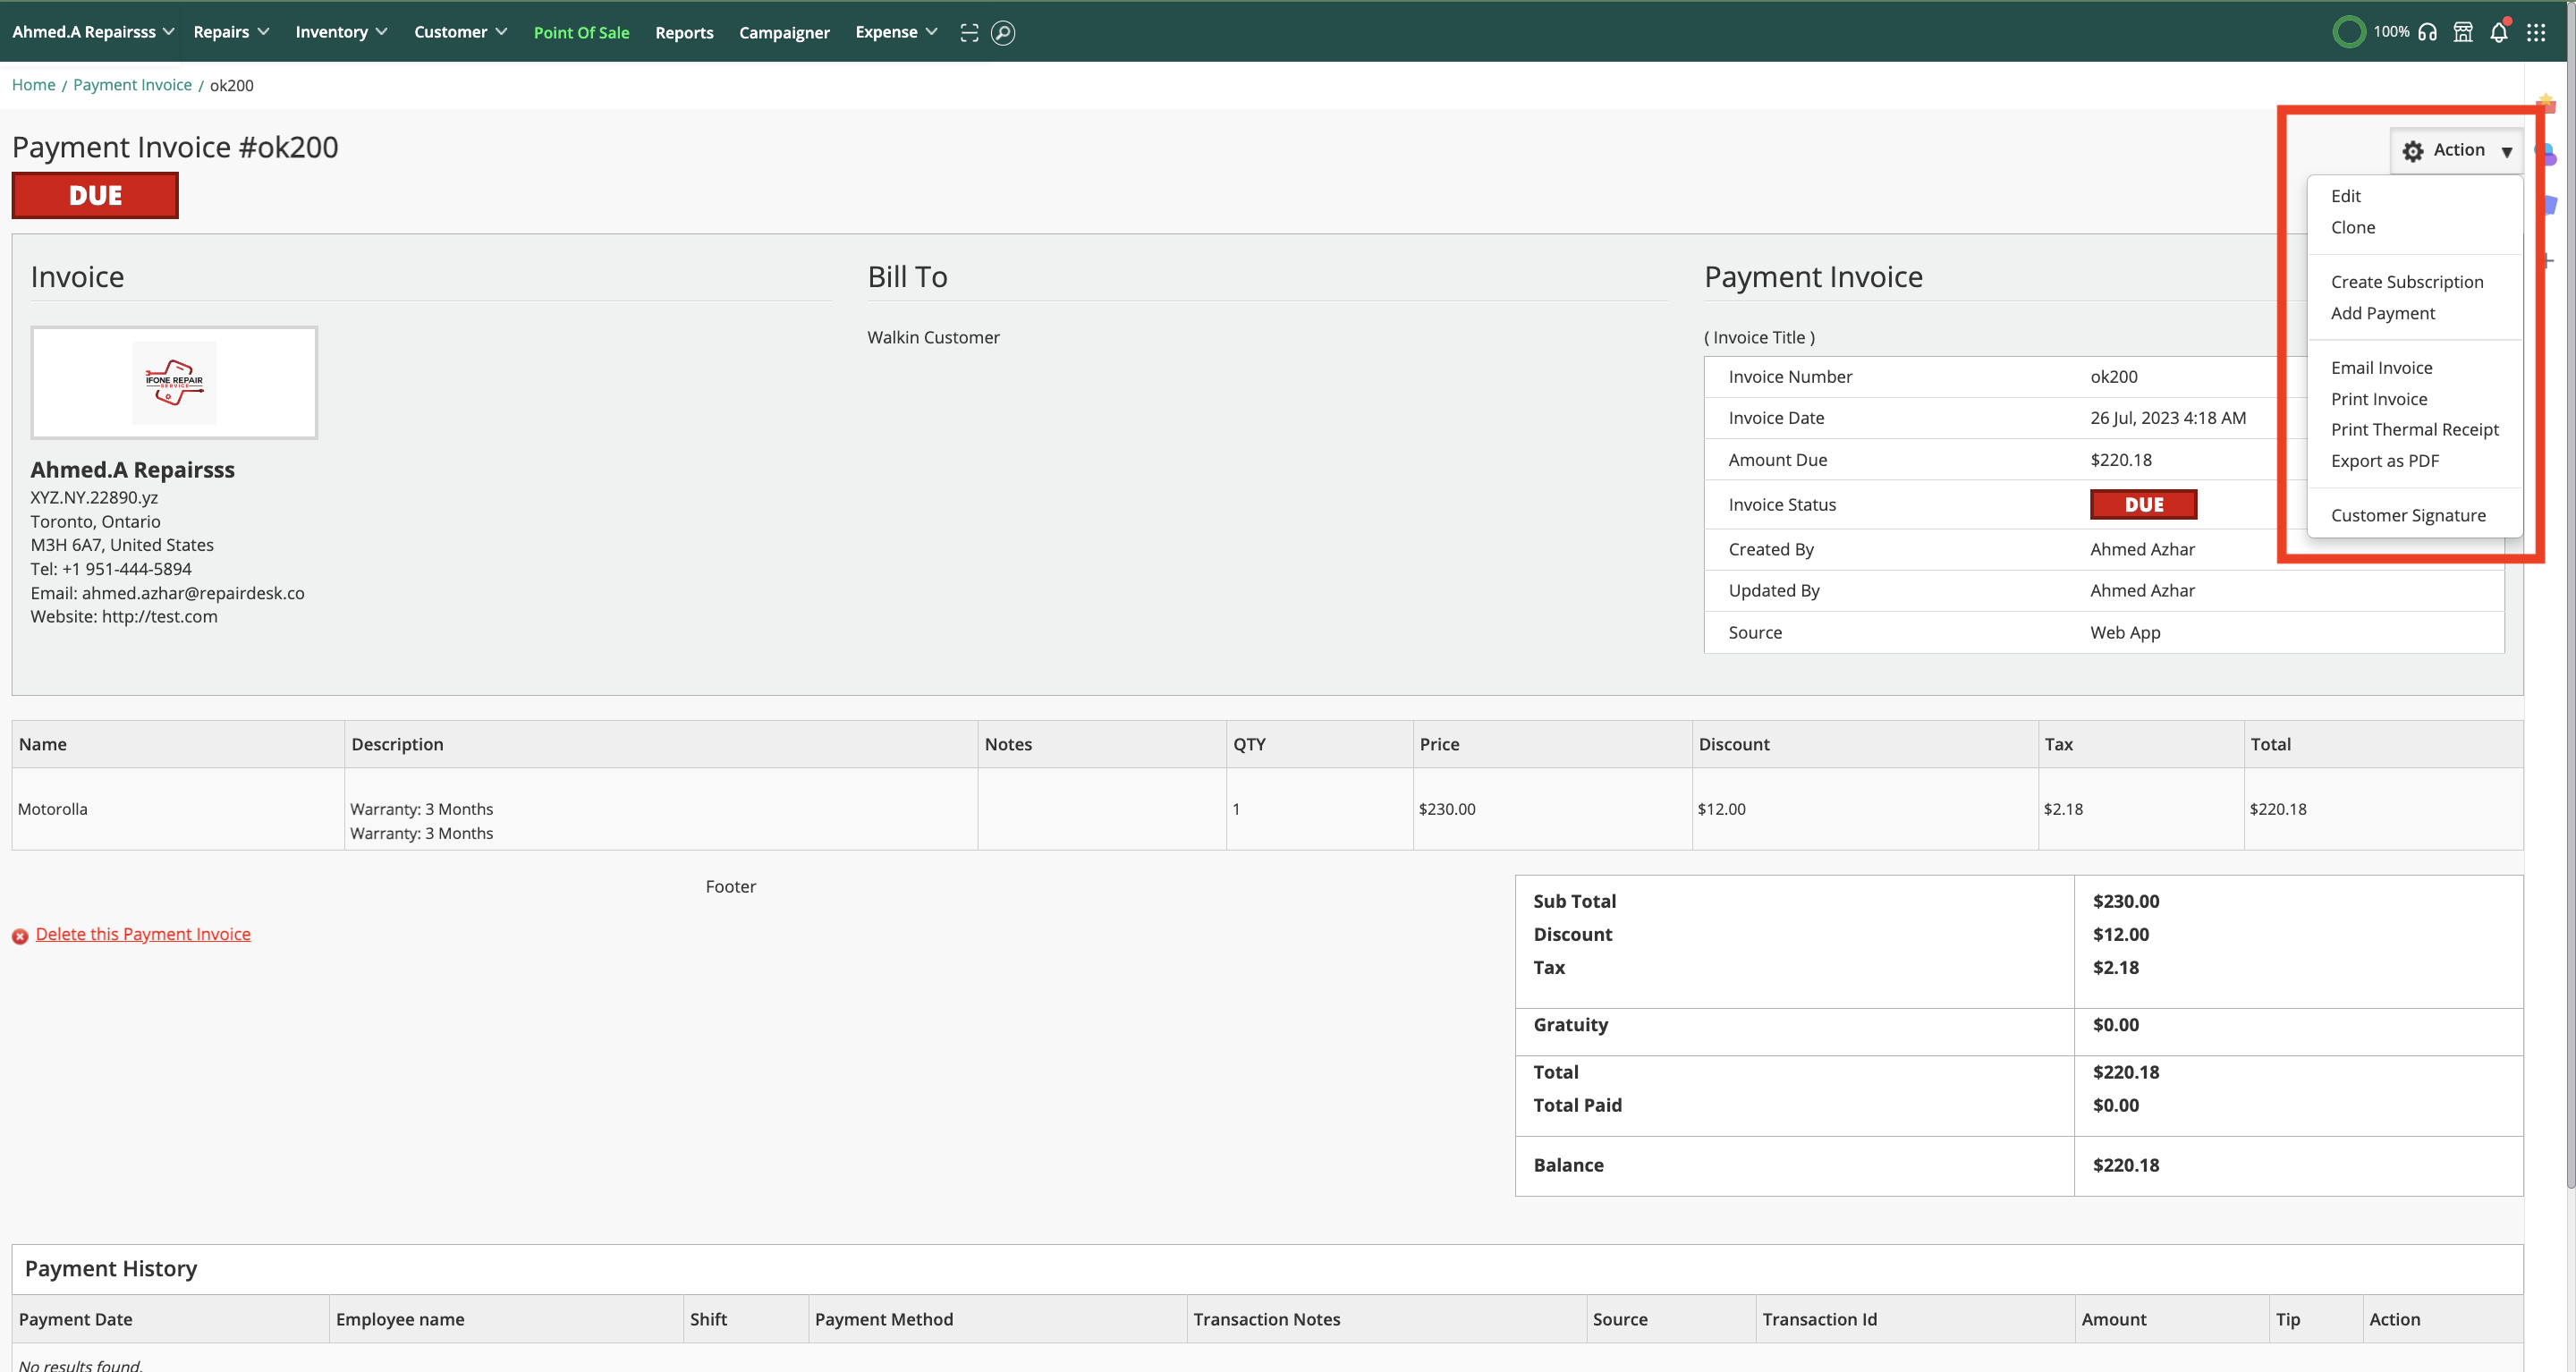
  • Edit: Modify invoice information, line items, taxes, and payments.
  • Clone: Duplicate invoice with a new invoice number.
  • Create Subscription: Turn invoice into a recurring billing cycle.
  • Add Payment: Record a customer or business payment.
Note: If adding payments one by one feels tedious, RepairDesk offers the ability to add payments to multiple invoices at once.
  • Email Invoice: Send the invoice to a customer via email.
  • Print Invoice: Generate a hard copy of the invoice.
  • Print Thermal Invoice: Print invoice using a thermal printer.
  • Export as PDF: Download invoice as a PDF file.
  • Customer Signature: Collect the customer’s digital signature.

7. Customize Invoices

You have the flexibility to customize invoices according to your requirements in RepairDesk. Refer to the dedicated article on how to customize invoices and options for customizing the Invoice ID.

Contact Support

If you have any questions or require further assistance, please visit our website at www.repairdesk.co or email us at support@repairdesk.co. Our support team is ready to help you with any queries or concerns you may have.

FAQs

How can I view invoices that are generated from tickets?
You can view invoices that are generated from tickets or without tickets by selecting the Reference criteria from the Select Criteria drop-down.

1

Go to the Invoices listing page.

2

Click on the Select Criteria dropdown and select the Reference criteria.

3

Click on any of the desired options from the Reference dropdown.

4

After selecting any of the above options, click on the Search button to view the results.


How can I add internal notes on an invoice?
You can add internal notes in invoices for your employees just like in the ticket section. To do this, go to the Invoices section and create a new invoice.
Note: You can also add internal notes to already existing invoices.
Path: Manage Invoices > Create Invoice or update Invoice
After adding the internal notes, you can view or edit them by clicking on the invoice from the listing.
Once selected, scroll to the bottom of the invoice screen where you’ll find the internal notes listed under the Private Comments tab.
If you want to restrict your employees from editing internal notes, you can do that by managing their permissions.
Go to the Roles & Permissions section to disable this option for specific employee roles.
Path: Settings > Employees > Manage Roles and Permissions > Invoices > Change Internal Notes
Once disabled, those employees will no longer be able to edit the internal notes on invoices.


How can I restrict employees from changing prices of items on an invoice?
RepairDesk provides you with multiple triggers to manage access across various parts of the app. You can control whether employees can modify prices or taxes on invoices. To do so, follow these steps:
1

Head to Roles Permission under Employees in Settings.

2

Select the Employee Role you want to edit.

3

Click on the Invoices section to expand and view available triggers.

4

Disable the trigger labeled Change Price & Tax.

5

Click on Save Changes.

Now, employees assigned to the selected role will not be able to modify prices or tax amounts on invoices.


Can i view stock of other store while creating invoice through manage invoice?

Yes, you can view the stock of another store while creating an invoice, but this depends on the permission assigned to the employee's role.

Can I hide the discount column and inline discount from the invoice receipt?
Yes, you can. RepairDesk now offers an option to hide the discount column and inline discount from the invoice receipt. You can choose to hide these elements if they are not relevant to your invoicing process.

Is there a way to see the total tax amount in the invoice listing?
Yes, you can now view the total tax amount directly on the invoice listing page. You no longer need to open each invoice individually to check the tax amount. This feature makes it convenient to get a quick overview of taxes applied to your invoices.

How can I refund invoices directly from the manage invoices page in RepairDesk?
RepairDesk now allows you to refund invoices directly from the Manage Invoices page, even if you don't have access to the POS.
Here’s how you can use this feature:
Permission Settings:
1

Go to Settings > Employees > Manage Roles & Permissions > POS.

2

Enable the Give Refunds permission.

Important: Admins and Super Admins will have this permission by default.
Give Refunds Permission
Employees with the Give Refunds permission will see a Refund option in the action dropdown menu for invoices.
Refund Option in Action Dropdown
Employees without this permission will not see the refund option under the action dropdown.
Clicking the Refund option redirects the user to the POS interface and opens a refund popup.
Refund Popup in POS
After clicking the Proceed button, the item will be loaded into the cart, and only the Checkout button will be enabled to process the refund.
Note: This works even if the employee doesn't have full access to the POS.
Legacy POS Refund Flow
Upon successful refund, the user will be redirected back to the Manage Invoices page.
By following these steps, you can efficiently process refunds directly from the Manage Invoices page in RepairDesk.
Can I show service description on invoices?
Yes, you can!
1

Go to 9 dots > Store Settings > Invoices

2

Turn on the trigger for Show Service Description on Invoice

3

Click Save.

Show Service Description Setting