How to transfer stock from one store location to another?
RepairDesk gives you the option of transferring inventory from one store location to another. You simply need to create a Transfer Order for sending inventory to another store location and receive items to complete the inventory transfer.
Don't worry - in just 6 steps we will show you how to send items to another location with a transfer order.
Steps:
1. Create Transfer Order.
a). Go to Inventory >> Transfer Inventory.
b). Click on the Create Transfer Order button at the top. It will take you to a screen where you can create a transfer order.
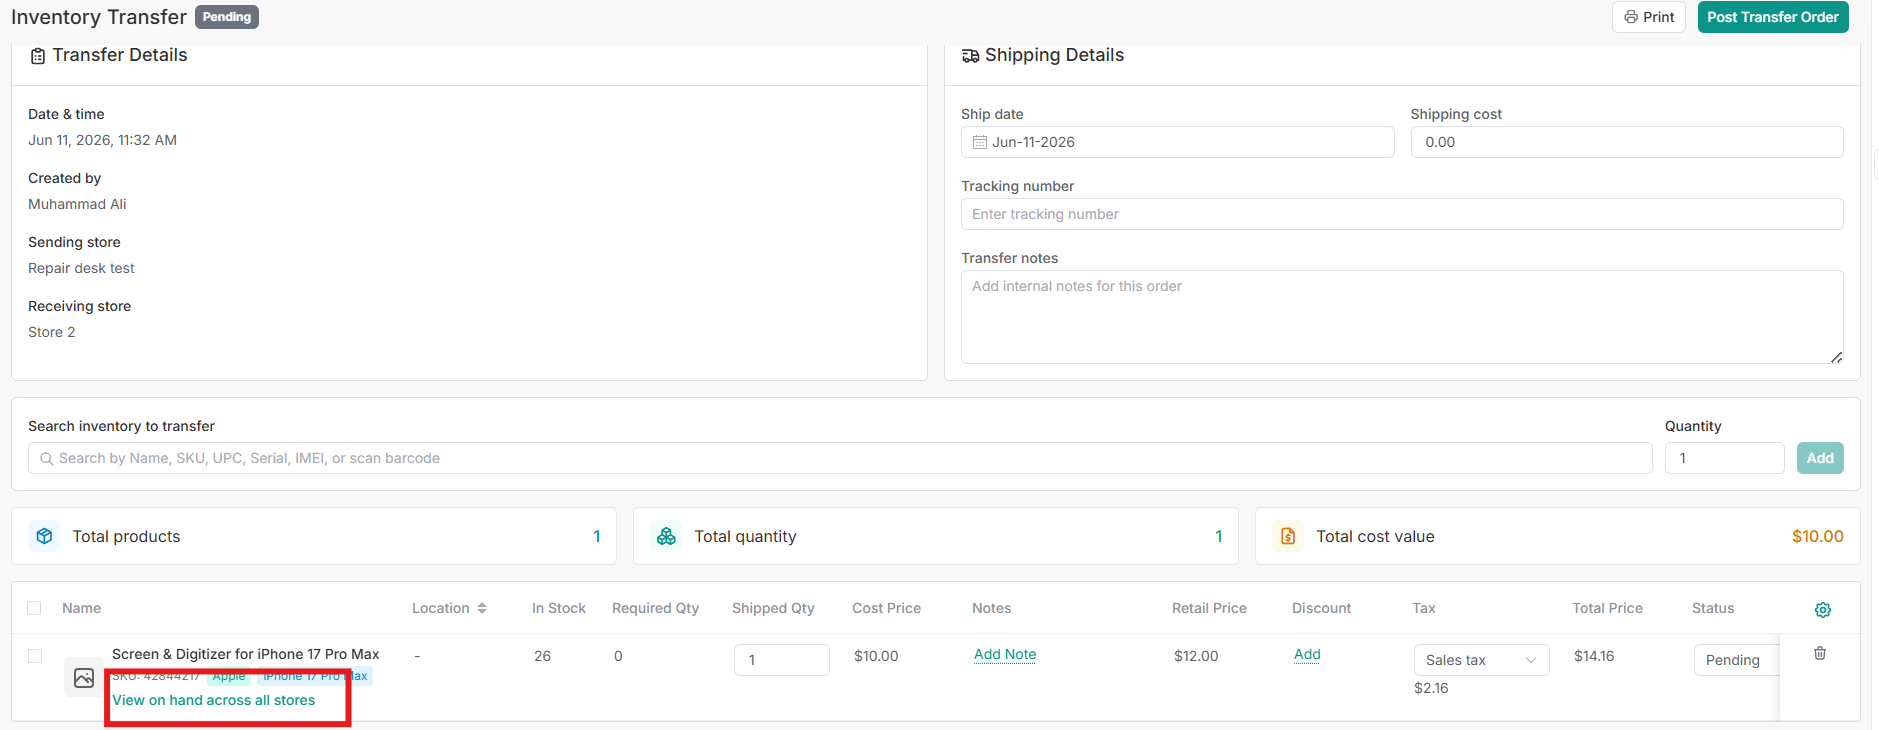
2. Add Transfer Order details.
Fill in the important information regarding the transfer order such as date & time of creating transfer order, shipping date, destination store, employee creating the transfer order, shipping charges, tracking ID, notes etc.
3. Add items to Transfer Order
a) Search for an item by Name, SKU, UPC, Serial, IMEI, or barcode in the search field at the top, then enter the quantity to transfer.
b) Click the "Add" button to add the item to the transfer order. The item will appear in the table below with all relevant details (location, in stock, cost price, retail price, etc.).
c) View summary metrics at the top showing Total products, Total quantity, and Total cost value for the transfer order.
d) Use the action icons in the table row to edit notes, add discounts/tax, or delete items from the transfer order.
4. Send Items
To send items via a transfer order, click "Post Transfer Order". Your transfer order has been created and items are waiting to be received at the destination location.
5. Receive Inventory
To receive the inventory which has been transferred to you, Go to Inventory>> Transfer Inventory>> Transfer In. Go to the transfer order with the status of waiting for items. Select the transfer order with the status of "Waiting for Items" and click "Receive Transfer Order" to receive it.
6. Print Transfer Order
You can print the transfer order by clicking on Print. You can also see the history of the transfer order by seeing the History at the bottom.
As you can see, with RepairDesk transferring inventory has never been more easier. What are you waiting for? Give it a try!
FAQs
Q. When can I sell items which are in a transfer order?
A. Until items in a transfer order are not received by the recipient store, you cannot sell these items. Once an item is marked as shipped, it goes to In-Transit Inventory and remain there until it is received by the recipient. Once an item is received, it can be sold then.
Q. How can I transfer low stock items from one store location to another?
A. While creating a transfer order, select the receiving store. A button will appear to show low stock items. Use that to quickly identify and add low stock items to your transfer order.
Q. What will happen to Canceled transfer orders?
Q. What will be the Procedure if receiver store reject the sent item?
A. If the receiver store rejects the item at the time of receiving then that item will be available in In Transit Inventory Report / with status as canceled. user from sender Store can Perform action against that item that either he will add them back to inventory or marked them as faulty. Once you add back item into inventory it will be removed from Intransit report.

Q. How can I transfer Serial from one store to other?
A. You can simply search serial while adding a transfer order. if the item is serialized then only selected serial will be transferred to another store. Once the serial is added in line then the user can not change added serials.
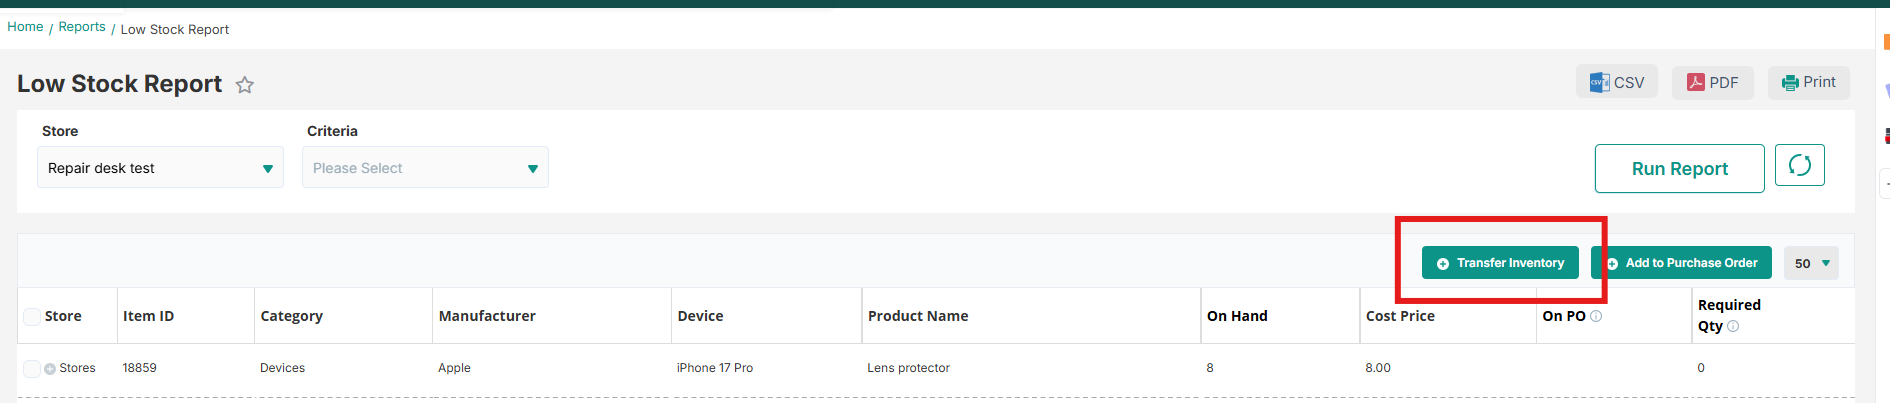
Q. How to create a transfer order using low stock report?
A. User can create inventory transfer using low stock report. After selecting specific item user will click add inventory transfer from low stock report, Here from store will be empty and in to store current store name will be displayed. When user will click on add to inventory transfer it will redirect user to inventory transfer page. And rest will be the same as done before in inventory transfer.
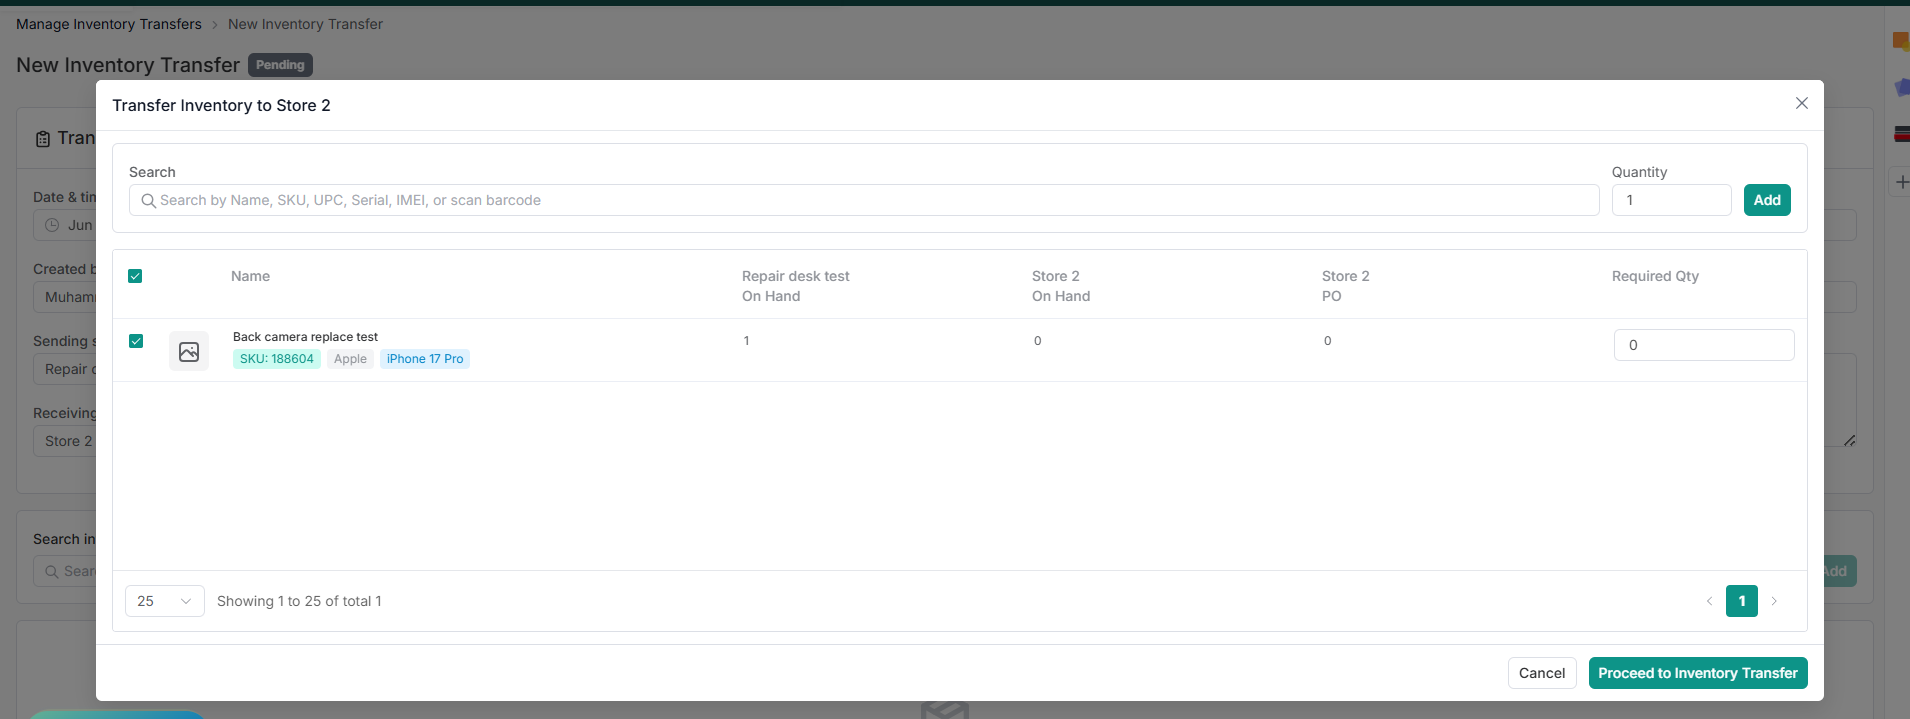
Q. Can i view stock of other store while creating inventory transfer?
A. yes you can see stock of other stores while creating transfer order, but its based on permission assigned to specific role.
View on hand across stores popup:
Q. How can I transfer multiple serials using inventory transfer functionality?
A. You can simply select a serilized item in order to create transfer order, their you need to select serials you want to transfer. you can either select serials manually or scan them with the help of a barcode scanner. Based on the scanned serial quantity and cost price will be updated. select the status for transfer order and based on that status serials will be transferred.
Q. Can I directly scan the serial and add it to the transfer order?
A. Yes, you can simply scan the item serial in SKU/ID field and that serial will be added. but you can only add one serial, if you want to add more serials then you need to select them from select serial POPUP.
Q. Can I create Transfer order using Low Stock Report from transfer order page?
A. Yes. A new improvement has been added where you can create the transfer order using the selected store's low stock report. You will see a link under the To store which will open a pop up of Low stock report. For more details, please click here.
Note: An option to scan the inventory items is also added on the transfer order page, where you can add the items by simply scanning it (which will save time). You can also mark all your items as shipped if there are multiple items added. To know more about these updates, please click here.